This post contains affiliate links. For my full disclosure policy, click here. Thank you so much for your support!
Showing posts sorted by relevance for query gift wrapping. Sort by date Show all posts
Showing posts sorted by relevance for query gift wrapping. Sort by date Show all posts
Wednesday, December 14, 2016
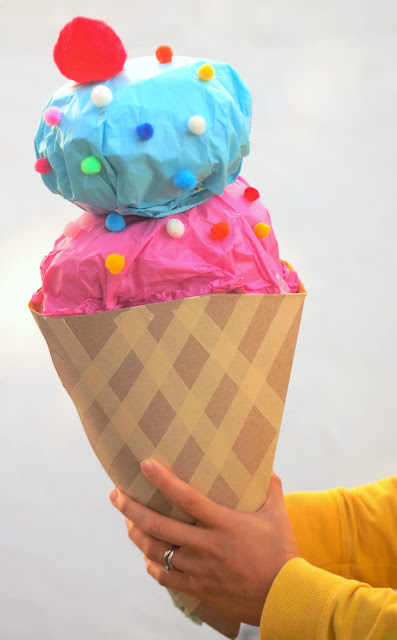
DIY Giant Ice Cream Cone Gift Wrapping (A fun Alternative to Christmas Stockings!)
Over the years I've done a lot of fun gift wrapping ideas on the blog. (Remember my Fox Gift Box and my Unicorn Gift Box?) Well, today I'm sharing a fun alternative to Christmas stockings... what about a Giant Christmas Ice Cream Cone instead?
Monday, November 24, 2014
Poppable Wrapping Paper (DIY Gift Wrapping Rockin' Art Mom Style!)
Are you looking for creative ways to wrap your holiday gifts? Well, today I've joined forces with fellow Rockin' Art Moms to share several imaginative and unique ways to wrap your holiday gifts! (So be sure to check out all the rockin' holiday ideas below!)
Because we always seem to have an abundance of bubble wrap lying around, I put our excess to good use and made this modern, poppable holiday wrapping paper!
I'm all about easy holiday crafts- like these paint chip Christmas Trees, easy DIY Reindeer Headbands, and mini pipe cleaner and cardboard Christmas trees. Today's wrapping paper idea is super simple, colorful, and fun! The recipient of your gift will get a kick out of popping the bubbles!
Because we always seem to have an abundance of bubble wrap lying around, I put our excess to good use and made this modern, poppable holiday wrapping paper!
Popping Holiday Wrapping Paper!
This post contains affiliate links. Thank you so much for your support!
I'm all about easy holiday crafts- like these paint chip Christmas Trees, easy DIY Reindeer Headbands, and mini pipe cleaner and cardboard Christmas trees. Today's wrapping paper idea is super simple, colorful, and fun! The recipient of your gift will get a kick out of popping the bubbles!
Friday, April 12, 2019
Creeper Minecraft Gift Wrapping Idea
Love Minecraft?
We've attended a couple of Minecraft themed parties in the past year and here's a fun way I've wrapped gifts for kids.
Tada!
This post contains affiliate links. This means I make a small portion off of any purchases made through the links at no additional cost to you. Thank you for the grocery money! For my full disclosure policy, click here.
We've attended a couple of Minecraft themed parties in the past year and here's a fun way I've wrapped gifts for kids.
Tada!
DIY Creeper Minecraft Gift Wrapping
This post contains affiliate links. This means I make a small portion off of any purchases made through the links at no additional cost to you. Thank you for the grocery money! For my full disclosure policy, click here.
Monday, September 26, 2016
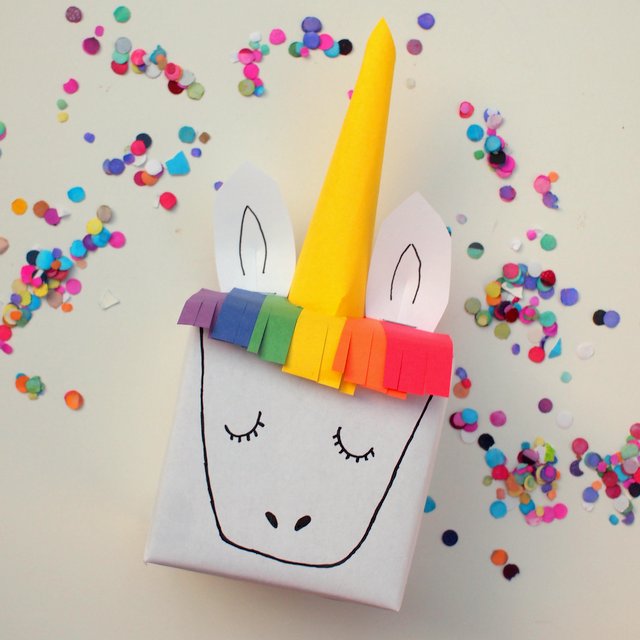
Magical Unicorn Gift Box Craft
If you're ever invited to a unicorn-themed birthday party.... you have to try out today's craft. Yup. I'm living out some childhood fantasies with this magical gift wrapping idea. Recently I turned a plain-jane gift box into a cute unicorn one! Tada!
This post contains affiliate links. Thank you for the grocery money! For my full disclosure policy, click here.
This post contains affiliate links. Thank you for the grocery money! For my full disclosure policy, click here.
Tuesday, September 30, 2014
DIY Pizza Gift Box
Ha ha! I bet you saw the words pizza and gift box and thought... what is Leslie up to this time? Is she wrapping things in used pizza boxes? Eeeeh no. (Although, I would probably wrap things in new boxes.... ooh, good idea... wait.. focus, focus!) Here's what today's post is going to be about:
Isn't it cute? Chuck took an extra long nap this weekend so I had time to try out a cool craft inspired by one found in this book . It's a small gift box that looks like a pizza! Now you can make your very own unique packaging to match your cool gift. And bonus- it's made from a used envelope. Yessirree my crafty friend, this craft has it all. It's cute and good for the environment too.
Let's get started!
DIY Pizza Gift Box
This post contains affiliate links. Thank you for your support.
Let's get started!
Sunday, September 24, 2017
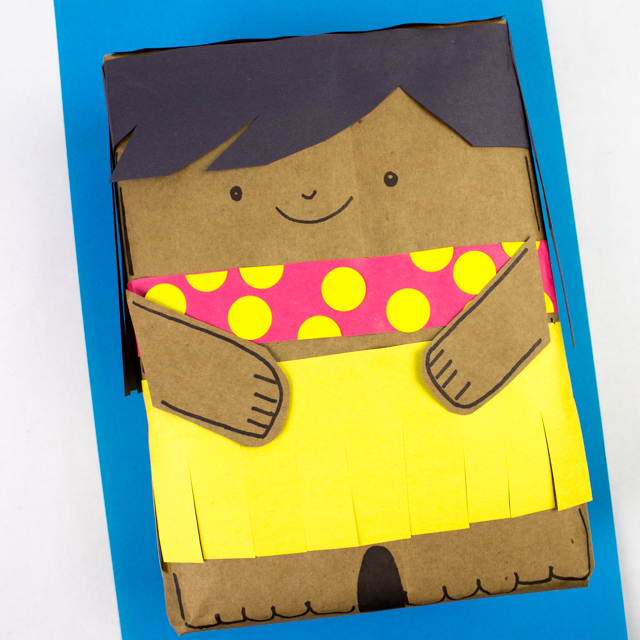
Hula Girl Wrapping Paper
Love birthday parties? Me too! This weekend we're going to a luau / Moana-themed party and I thought it would be fun to wrap our birthday gift so that it looks like a hula girl.
Isn't she sweet?
Isn't she sweet?
Thursday, September 22, 2016
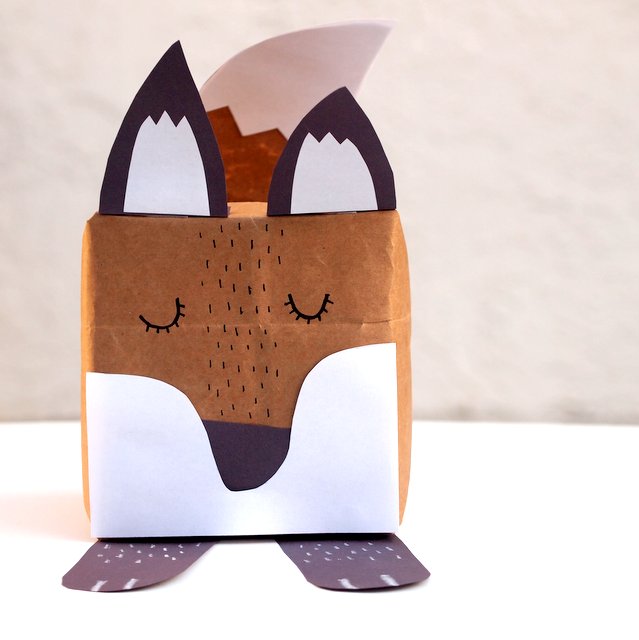
Quirky Fox Gift Box Craft
Ah fall. Colorful leaves, cool air, and.... forest animals? Hello, friends! We've done 3D Butterfly Gift Wrapping and Kiss Wrapping Paper over here on the blog. I figured it was time to do a fall-themed wrapping paper idea. And what says fall more than foxes? (Ok, ok. Perhaps forest animals aren't particularly fall-ish... but they are on trend and oh so cute!)
This post contains affiliate links. Thank you for your support! For my full disclosure policy, click here!
This post contains affiliate links. Thank you for your support! For my full disclosure policy, click here!
Friday, February 6, 2015
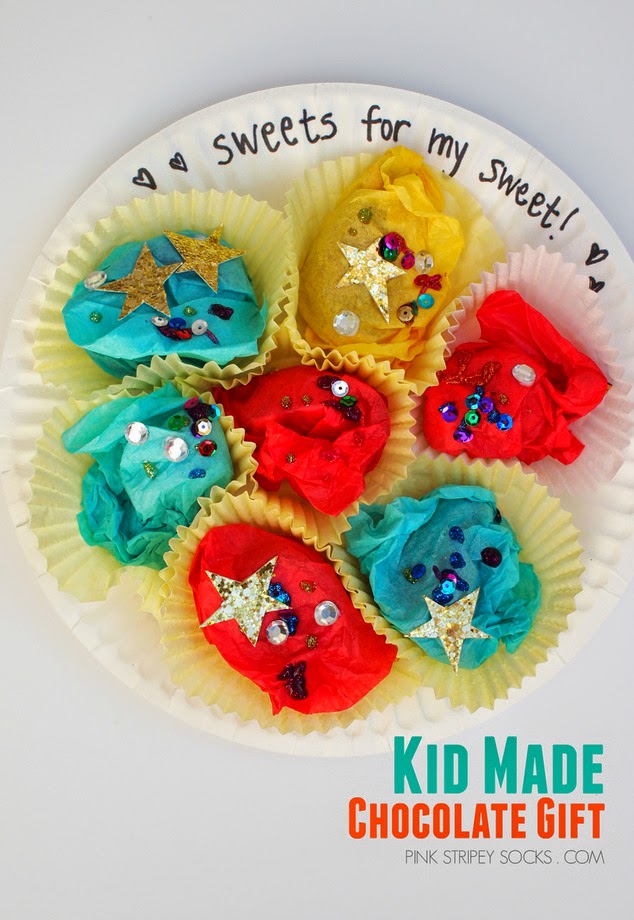
Easy Kid made Valentine Chocolate Gift
Handmade gifts rock. This week's Creative Preschool Collaborator theme is Valentine's Day! Since hubby REALLY loves chocolate, Chuck and I made him a special chocolate Valentine's gift. Shhh. Don't tell him about it. It's a surprise!
Aren't they cute? They look so fun and colorful... almost like cupcakes! We had a ton of fun making this plate of goodies. Chuck even enjoyed it more than our Kiss Wrapping Paper! So keep reading to see how we made this lovely gift and check out 4 other great Valentine's activities and crafts from the other members of the Creative Preschool Team.
Kid Made Valentine Chocolate Gift
This post contains affiliate links. Thank you for your support!
Thursday, November 21, 2013
DIY Crapted Wrapping paper (Plastic Bag Printing and Cat Stencils) and DIY Washi Tape
Alright, this post's title is rather crazy. In my defense, I just put everything up there because I couldn't figure out a better way to incorporate all the ideas into one slick title.
Hrmm... let's take a step back and start again.
*Breathes*
My sister's birthday is coming up next week. I already bought her a gift and thought it would be nice to crapt the wrapping paper. So, I cut up a paper bag (the kind that you get from a store when you buy stuff) and made these two crapty wrapping paper patterns:
The design on the left was made using this Plastic Bag printing method. It was inspired by my sister's love of turtles. (That's what the green blobs are.)
The design on the right is made using cereal box stencils. It's a bit more modern. (Psst- Can you tell that it's a bunch of golden cat faces?)
Would you like to see how I printed the patterns? If so, read on! If not, you can always eat some ice-cream. Yum.
Directions:
1. Doodle your cat face on a piece of cereal box. Cut the face out.
2. To keep your design even, first use a pencil to lightly mark where you want your cat faces. (I used my stencil as a guide.) Then, stencil your design over your pencil marks. When you're stenciling, don't load too much paint onto your sponge brush and keep your hand steady as you hold down the stencil so you don't smudge your design. If you're worried, you can always do a couple of trial runs on a piece of scrap paper first.
3. Let your design dry and you're done! Meow!
1. "Ink" your plastic bag by painting over a portion of it. (If you're a clutz like me, only paint in the middle of your bag. This way your hands won't smear the paint when you flip the bag over.)
2. Use a Q-tip (or the back of your paint brush) to remove bits of paint and create a design.
3. Flip your bag around and press the painted side on top of your wrapping paper. Rub your hand over the design to make sure it transfered.
4. Repeat this step to add other blocks of colors or designs. (I used the same bag throughout and simply wiped off excess paint with a paper towel.)
You can also paint little shapes onto your bag and then use those to make prints too.
And since I was already making the wrapping paper, I figured I might as well make fake washi tape out of masking tape. I simply took pieces of masking tape, stuck them to parchment paper, and then doodled on them with Sharpie markers. The ends of the tape don't completely adhere to the parchment paper, but that's ok because I used the tape up right away.
Did you make it this far? Phew. *High five.* This was a long post. Here's a photo of the final product. (I chose the cat design because it looked cooler. Plus, my sister really loves her cat.)
Here's a photo of the back. Yurp. I went crazy with my fake washi tape because the patterns were just too cute.
Happy Thursday!
Hrmm... let's take a step back and start again.
*Breathes*
My sister's birthday is coming up next week. I already bought her a gift and thought it would be nice to crapt the wrapping paper. So, I cut up a paper bag (the kind that you get from a store when you buy stuff) and made these two crapty wrapping paper patterns:
The design on the left was made using this Plastic Bag printing method. It was inspired by my sister's love of turtles. (That's what the green blobs are.)
The design on the right is made using cereal box stencils. It's a bit more modern. (Psst- Can you tell that it's a bunch of golden cat faces?)
Would you like to see how I printed the patterns? If so, read on! If not, you can always eat some ice-cream. Yum.
How to make cat stenciled wrapping paper:
Materials:
- Cereal box
- Pen
- Pencil
- Exacto Knife
- Scissors
- Cutting mat
- Paint
- Sponge brush
- Paper towel
Directions:
2. To keep your design even, first use a pencil to lightly mark where you want your cat faces. (I used my stencil as a guide.) Then, stencil your design over your pencil marks. When you're stenciling, don't load too much paint onto your sponge brush and keep your hand steady as you hold down the stencil so you don't smudge your design. If you're worried, you can always do a couple of trial runs on a piece of scrap paper first.
3. Let your design dry and you're done! Meow!
How to make a plastic bag printed wrapping paper design:
Materials:
- Sandwich bag
- Paint
- Paint brush
- Q-tip
- Paper Towel
Directions:
2. Use a Q-tip (or the back of your paint brush) to remove bits of paint and create a design.
3. Flip your bag around and press the painted side on top of your wrapping paper. Rub your hand over the design to make sure it transfered.
4. Repeat this step to add other blocks of colors or designs. (I used the same bag throughout and simply wiped off excess paint with a paper towel.)
You can also paint little shapes onto your bag and then use those to make prints too.
And since I was already making the wrapping paper, I figured I might as well make fake washi tape out of masking tape. I simply took pieces of masking tape, stuck them to parchment paper, and then doodled on them with Sharpie markers. The ends of the tape don't completely adhere to the parchment paper, but that's ok because I used the tape up right away.
Did you make it this far? Phew. *High five.* This was a long post. Here's a photo of the final product. (I chose the cat design because it looked cooler. Plus, my sister really loves her cat.)
Here's a photo of the back. Yurp. I went crazy with my fake washi tape because the patterns were just too cute.
Happy Thursday!
Wednesday, May 6, 2015
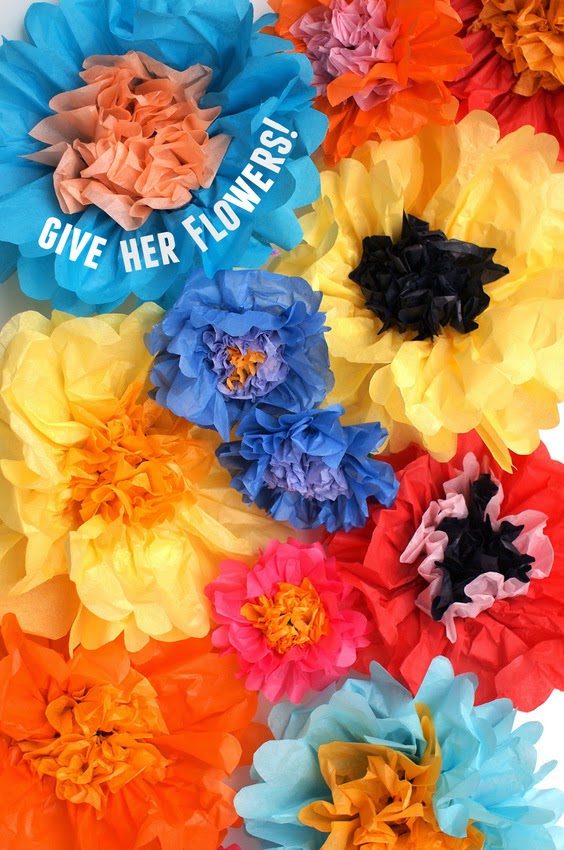
How to Make Tissue Paper flowers
Are you looking to create gorgeous, realistic tissue paper flowers with the kids? Then this is the tutorial for you! These flowers are beautiful and super easy to make. Just grab a bunch of tissue paper, pipe cleaners, and scissors and you're all set to make a colorful bouquet for someone special!
How to Make Tissue Paper Flowers
This post contains affiliate links. Thank you for your support!
Wednesday, February 27, 2013
Make a Sharpie decorated plate
I never know what to get people as gifts. Maybe you're like me? I walk through the entire store several times. Each time around, I find different treasures and then mentally debate the pros and cons of the item for several minutes. Then, I inevitably change my mind and movie onto the next item. Then, after about 2 hours of mumbling to myself like a crazy lady, I finally leave empty handed, with only a grouchy hubby and fussy baby to show for my effort.
So when I was invited to a friend's bridal shower, I knew I was in trouble. If buying gifts for the building's superintendent already caused me grief, buying a gift for a longtime friend should have sent me into cardiac arrest.
Unfortunately (or perhaps fortunately?), Chuck's been having a rotten time with teething, so this time around I just took the easy way out: gift card. Packaged money. And honey, who doesn't want money?
As I walked towards the cash register that nagging voice started whispering in my ear, "Leslie. Is this really the best gift? You've known her for how long? Isn't this a bit impersonal?" I tried responding back, "Shush. Chuck's actually behaving nicely. If we leave now I can get good parking. And I don't need to buy wrapping paper."
But the nagging voice continued, and I finally succumbed. But this time a crafty idea also came to me and I took a quick trip to the kitchen section and grabbed a plate.
Because after seeing the gorgeous DIY Anthropologie knock-off mug from Home Heart Craft, I had to get into the Sharpie plate decorating market.
And after a couple of hours, I came up with this lovely plate:
I really like how it turned out. It's beautiful, personal, quirky, useful, and *fingers crossed* long-lasting. (I didn't try washing it... so I'm hoping the marker holds.)
Want to use Sharpie markers to unleash your creativity on some unsuspecting pieces of china? Read on!
Materials:
- Oven
- Plate (I got mine at Target)
- Sharpie markers
- Paper
- Pencil
- Scissors
- Tape
- Q-Tip
Directions:
1. Trace your plate onto a piece of paper and cut out the resulting shape. Now you know how big to make your design..
2. Come up with your design. (This was super hard. I knew I wanted to practice my handwriting skills and include something romantic and slightly naughty.)
3. Turn your paper over. On the back, rub your pencil over the back of your design. (Guess what? You've essentially made your own carbon paper!)
6. Pop your work of art into the oven and bake at 400 degrees for 45 minutes. Then, admire your handiwork and wrap it up.
(Have you ever tried to draw on plates or mugs with Sharpies? Did the Sharpie marker stay on even after you washed the item? I'm hoping my design stays on. Hubby received this lovely mug decorated with Sharpie from his students last year.... and the message they wrote washed away after several rinses. Luckily we took a photo of the mug before everything disappeared... but it was still pretty disappointing. *Crosses fingers*)
So when I was invited to a friend's bridal shower, I knew I was in trouble. If buying gifts for the building's superintendent already caused me grief, buying a gift for a longtime friend should have sent me into cardiac arrest.
Unfortunately (or perhaps fortunately?), Chuck's been having a rotten time with teething, so this time around I just took the easy way out: gift card. Packaged money. And honey, who doesn't want money?
As I walked towards the cash register that nagging voice started whispering in my ear, "Leslie. Is this really the best gift? You've known her for how long? Isn't this a bit impersonal?" I tried responding back, "Shush. Chuck's actually behaving nicely. If we leave now I can get good parking. And I don't need to buy wrapping paper."
But the nagging voice continued, and I finally succumbed. But this time a crafty idea also came to me and I took a quick trip to the kitchen section and grabbed a plate.
Because after seeing the gorgeous DIY Anthropologie knock-off mug from Home Heart Craft, I had to get into the Sharpie plate decorating market.
And after a couple of hours, I came up with this lovely plate:
I really like how it turned out. It's beautiful, personal, quirky, useful, and *fingers crossed* long-lasting. (I didn't try washing it... so I'm hoping the marker holds.)
Want to use Sharpie markers to unleash your creativity on some unsuspecting pieces of china? Read on!
Materials:
- Oven
- Plate (I got mine at Target)
- Sharpie markers
- Paper
- Pencil
- Scissors
- Tape
- Q-Tip
Directions:
1. Trace your plate onto a piece of paper and cut out the resulting shape. Now you know how big to make your design..
2. Come up with your design. (This was super hard. I knew I wanted to practice my handwriting skills and include something romantic and slightly naughty.)
3. Turn your paper over. On the back, rub your pencil over the back of your design. (Guess what? You've essentially made your own carbon paper!)
4. Tape your design to your plate. Trace over your design with your pencil. Lift up your paper and you'll find a faint imprint of the design underneath. (Magical!)
5. Use Sharpie to trace over your design. I have shaky hands, so I did this very slowly and carefully. Some parts of the lettering came out a big uneven, so I retraced over parts to make sure that everything looked uniformly black. Once my Sharpie dried, I brushed off any visible pencil residue with a Q-tip. Feeling inspired, I also free handed a design on the back.
(Have you ever tried to draw on plates or mugs with Sharpies? Did the Sharpie marker stay on even after you washed the item? I'm hoping my design stays on. Hubby received this lovely mug decorated with Sharpie from his students last year.... and the message they wrote washed away after several rinses. Luckily we took a photo of the mug before everything disappeared... but it was still pretty disappointing. *Crosses fingers*)
Tuesday, October 8, 2019
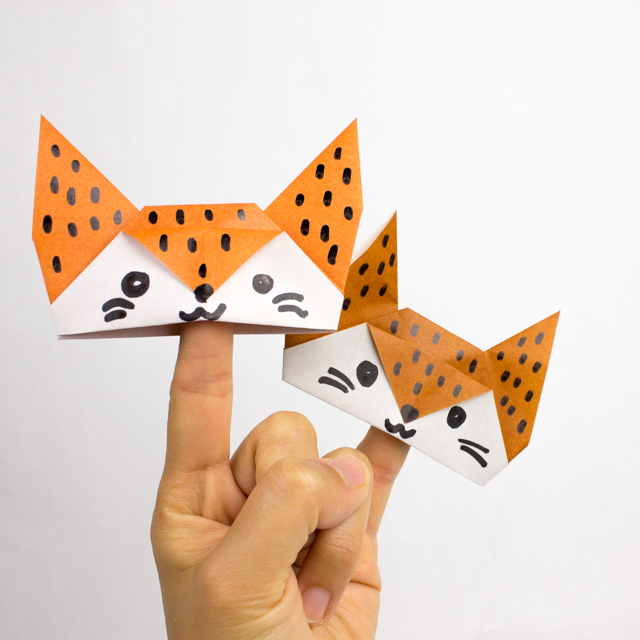
Origami Fox Finger Puppets (And 9 Fun Fox books!)
Are foxes the unofficial animals for fall? I'm not sure, but I feel like I see foxes and owls EVERYWHERE. I'm jumping on the trend (late, as usual) with today's fox-themed finger puppets. It's an easy and cute origami project that the kids can play with once they're done crafting. (And keep reading to the end to get a list of our favorite fox-themed books too!)
This post contains affiliate links. This means I make a small bit of money for any purchases made through the links at no additional cost to you. Thank you for your support. For my full disclosure policy, click here.
How to Fold Origami Fox Finger Puppets
This post contains affiliate links. This means I make a small bit of money for any purchases made through the links at no additional cost to you. Thank you for your support. For my full disclosure policy, click here.
Monday, August 17, 2020
How to Fold Origami Minecraft Creepers (Easy and less than 5 minute craft)
Looking for an easy and cute Minecraft craft? Why not try folding creepers? Kids of all ages will enjoy making this easy origami project.
How to Fold Origami Minecraft Creepers
(in less than 5 minutes!)
Subscribe to:
Posts (Atom)

