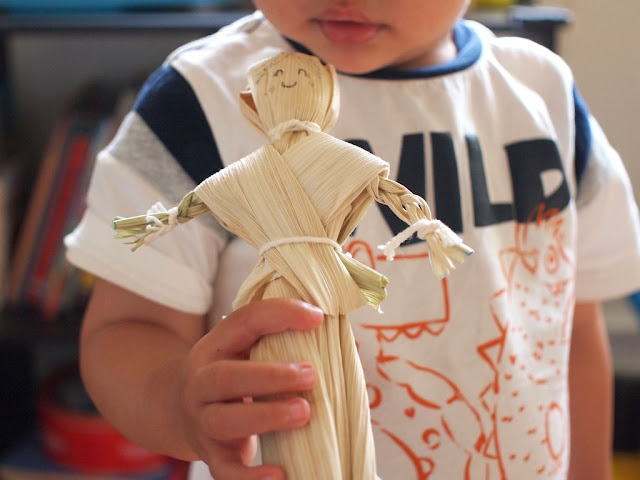
Even though I really enjoy eating corn, I'm always slightly disturbed at the end of the meal. Have you ever noticed just how much we toss out once we're done with the corn? Those corn cobs and husks are quite heavy and take up a lot of space in comparison to the tiny yellow kernels
So, I thought I'd try making something from the castaway bits. Here's my little corn husk doll.
Corn Husk Doll
Materials to Make Corn Husk Doll:
- Corn husks (I used corn husks from about 5 ears of corn. But note- since I roast my corn, I was only able to get a couple leaves from ear. You could probably do it with fewer ears if you use up all the leaves.)
- Yarn
- Scissors
- Paper towels
- Baking pan
- Shallow Pan
- Sharpie marker
- Water
Directions to Make Corn Husk Doll:
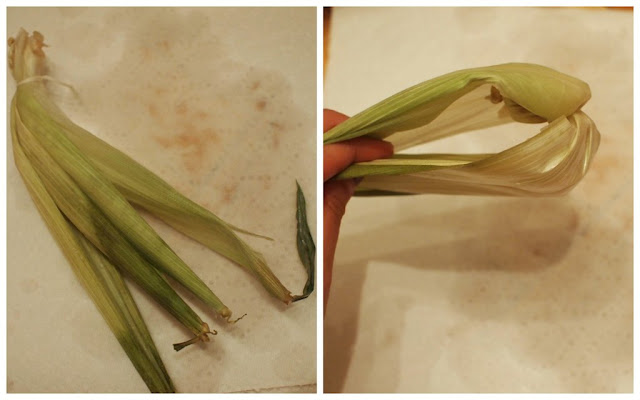
1. Rip off the leaves from your corn. Set them out to dry. (We live in an apartment, so I just placed them on a baking dish near a sunny window. After a couple of days they just shriveled up.) Note: If you make the dolls with the green leaves, all your bindings will come loose once the leaves start shriveling up and drying.
2. Once your leaves dry, re-hydrate them in a bit of water. (It took my leaves about half an hour to plump out.)
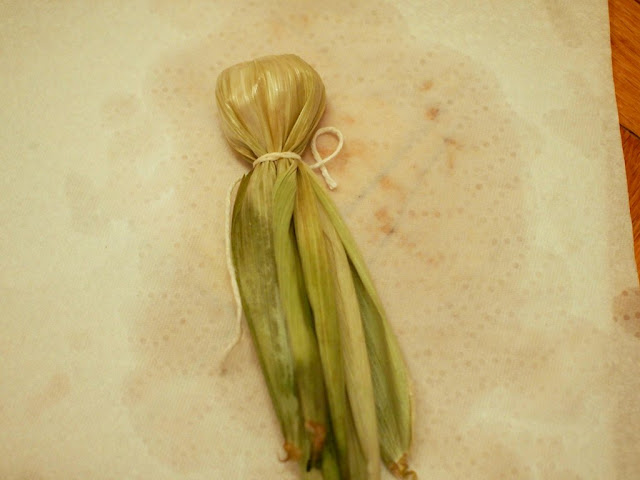
3. Now you're going to make the head and the body. Pick out 4-5 nice large leaves. Tie them tightly together with a bit of yarn.
4. Flip the leaves over your yarn.
5. Straighten out the leaves and then tightly tie a piece of yarn to make your head. (Make sure that the leaves are smoothed out and cover each other. Try not to have any gaps where the yarn is visible. I wasn't too careful and my poor doll's head had a bit of gap once the leaves started drying again.)
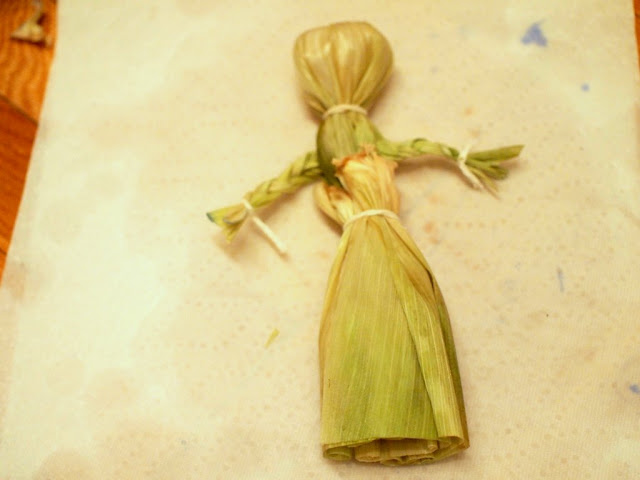
6. Now you're going to make the arms. Find another nice large leaf. Cut two slits on one side of the leaf. Then, cut two slits on the other side of the leaf. Braid both sides and secure the braids with bits of yarn. Trim off the ends.
7. Open up your doll's body and slide the braided arms in. Tie another piece of yarn to create the waist and hold the arms in. 

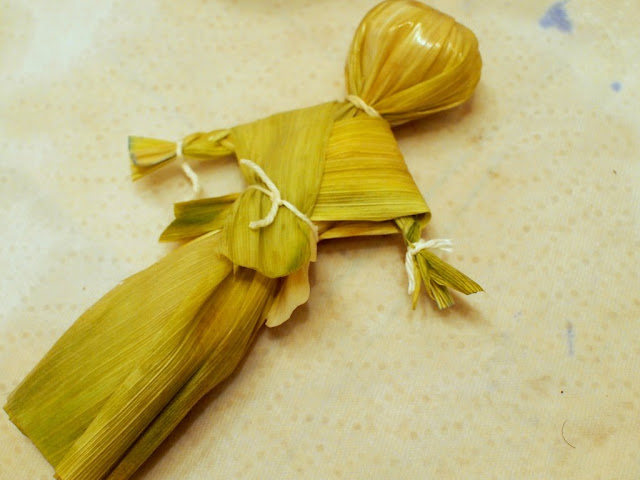
8. Now you're going to make a skirt. Take a bunch of nice big leaves and wrap them around your doll's waist. Tie these leaves to the waist with another piece of yarn. Then, trim off the the ends of the leaves to create the skirt. (If you wanted to give your doll pants, you could also just split your leaves up into two piles and tie those off to create trousers.)
9. Now you'll create a shawl for the doll (which will help cover the ugly waist bit.) Take two nice leaves and criss-cross them over and behind the dolls body. Tie off your leaves with yarn. Trim any excess bits.
10. Now you've got yourself a doll. Once the doll dries, use a Sharpie marker to draw a face on it. Voila. Now you've got your very own corn husk doll.
Not sure if Chuck was a big fan of the doll, but I enjoyed the experience of taking something destined for the garbage and giving it a second life.
For more information on making corn husk dolls, check out these three great resources: GardenMama blog, Acorn Pies blog or this YouTube video They really helped me to figure everything out.
Happy crapting!


