Was anyone else so caught up in Halloween that they didn't really notice the leaves changing colors until this past weekend? Anyone, anyone? *Cricket chirps* Oof. Maybe it was just me. I guess I was just stuck in my own little candy and costume daze.
But now that my head is back on straight I'm seeing color... and I'm liking it! Wowzers! The trees are looking a-mighty gorgeous. I'm going goo-goo ga-ga over all the brilliant reds, happy yellows, and rich oranges that greet me on the street.
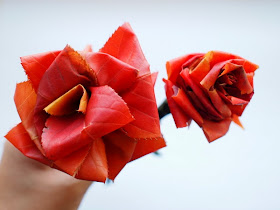
Last year I pinned this DIY autumn leaf bouquet, and I swore to myself that I would try it next year. Well, it's now next year! So, I grabbed a bunch of leaves and made myself some autumn "roses." Quick and simple, this craft perfectly captures the colors of fall.
The "rose" on the left was made with different types of leaves than the "rose" on the right.
Here's how I made the left "rose:"
Materials:
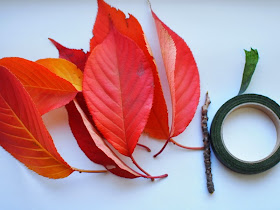
- Around 10 colorful leaves of assorted sizes (preferably freshly fallen or plucked from the tree)
- Twig
- Floral tape
- Scissors (optional)
Directions:
1. Arrange your leaves from smallest to largest. (Not shown.) Pull out one of your smaller leaves and fold it in half, with the colorful side on the outside
2. Roll your leaf into a small tube.
3. Fold a slightly larger leaf in half. Place your previously rolled tube in the middle of the leaf. Now you've got your first "petal.
4. Fold another slightly larger leaf in half and add that to your previously folded/rolled leaves.
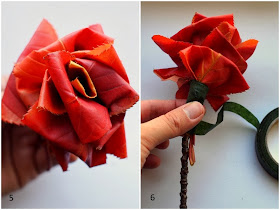 5. Continue to add "petals" in this manner. Remember to alternate where
you place your petals to make your flower more realistic looking. Also
make sure to keep a tight grip onto the bottom of your "rose" to make
sure your "petals" stay put.
6. Once you're satisfied with the way your "flower" looks, wrap floral tape around all the stems. Add a twig to the stems and continue wrapping until the twig is covered.
Here's how I made the right "rose" out of maple leaves:
Materials:
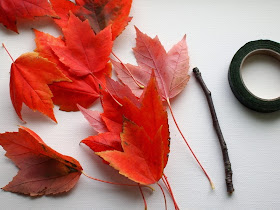
- Around 10 colorful leaves of assorted sizes (preferably freshly fallen or plucked from the tree)
- Twig
- Floral tape
- Scissors (optional)
Directions:
1. Arrange your leaves from smallest to largest (Not shown.) Find your smallest leaf and fold down the middle point of the maple leaf.
2-3. Fold down the bottom point. Now roll your leaf into a little tube, making sure to stick the leaf's points inside the roll.
4. Find a leaf that's slightly larger than your first. Fold down the middle point of that leaf and place your previously rolled leaf inside.
5. Fold down the second leaf's right point and wrap it around the rolled leaf.
6. Fold down the second leaf's left point and wrap it around the rolled leaf. Hold tightly to their stems! Now you have the beginning of your rose.
7. Keep repeating this process. Each time, find a slightly larger leaf and fold down the middle point. Then, place your growing "rose," over the folded point. Then fold down the points on each side of the outer leaf and wrap it around your "rose" to make "petals." Be sure to keep a tight grip onto all your stems as you go along.
8. When you're satisfied with your "flower," wrap the stems with floral tape. Then add a twig and keep wrapping to create a larger "rose" stem.
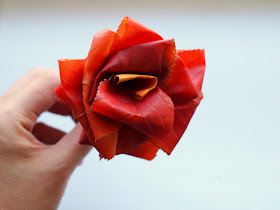
And that's it! The maple leaves create a tighter looking rose.
Now go out there, grab some leaves, and start making yourself some flowers. (Or, if you know of another Autumn leaf craft, do share! I'd love to try them out before all the leaves turn brown and dry up. Boo.)
More Fall Crafts...
If you liked this autumn themed craft, here are some more fun fall crafts!- Two Toddler-approved Fall Crafts
- No Carve Colorful Pumpkins
- Homemade Puffy Paint Fall Leaves
- Moveable Pumpkin Faces
- Recycled Pumpkin Suncatcher Craft
- Recycled Terrarium
Happy autumn crafting!
Let's keep in Contact!
Pin It

