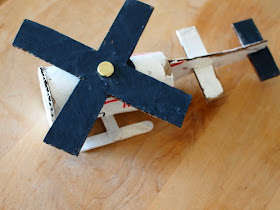
Toilet Roll Helicopter Craft
(*Note: This post includes affiliate links which means that I earn a small commission for every purchase made at no extra cost to you. Thank you so much for your support.)
Materials Needed to make Toilet Roll Helicopter
- Toilet Roll Helicopter Template
- Toilet Paper Roll
- Scissors
- Hot glue gun
- Sharpie Markers
- Craft Paint
- Paint Brush
- Mod Podge
- Sponge Brush
- Corrugated Cardboard
- Craft Knife
- Paper Fasteners
- Pen
- Mini Popsicle Sticks
Directions to make Toilet Roll Helicopter
1. Print out the template. Cut out the pieces and trace them onto cardboard. Cut out the pieces.
2. Poke holes through the parts that will attach your spinning rotor blades. Trim your cardboard roll body to make it look more proportional with the tail.
2. Cover your work area and paint your pieces!
3. When your paint is dry, use a Sharpie Marker
4. Then, use Mod Podge to protect your paint job. (This is really important if your child is going to play with his new toy.)
5. Now use one of your Paper Fasteners to attach the rotor blades to your body. (I added the cardboard circle underneath the blades to help them turn smoothly.)
6. Cut two slits in the bottom of your helicopter's body and slide in a mini popsicle stick.
7. Hot glue two other popsicle sticks on either end to create your landing skids.
8. Now assemble your tail. Use hot glue to secure the pieces in.
9. Slide your tail into your toilet paper roll and hot glue it in place. Then, hot glue your face in place.
Now you've got yourself a toilet roll helicopter!
We built this guy a couple of weeks ago and Chuck is STILL playing with it. (It's also lasted through all of his imaginary play too... pretty impressive, right?)
Hope you have fun making one of these for your child too! Happy crafting and happy flying, friends! Pin It


