Tissue Paper Flower Kids Craft
This post contains affiliate links. Thank you for your support! You can read more about my affiliate link policy here.
Prior to doing this craft, we've been reading quite a few Chinese New Year Books. (I find that picture books explain ideas in much better than I ever could.) Here are some of our favorite reads so far!
Our favorite Chinese New Year Books
- The Runaway Wok
- Bringing In the New Year
- My First Chinese New Year
- Lion Dancer: Ernie Wan's Chinese New Year
- Celebrating Chinese New Year
- Sam and the Lucky Money
Materials Needed:
- Art Tissue Paper
- Scissors
- Twigs
- Hot Glue gun
- Origami Paper
- Washi Tape
Let's Make Some Tissue Paper Flowers for Chinese New Year!
First, I cut out large squares/ rectangles from the tissue paper. (Play around with the size of your paper. At first my squares were way too small and hard for us to crumple into flowers. I found bigger squares work the best.)(And if you want to make the paper lanterns, keep reading! I share how I make them below.)
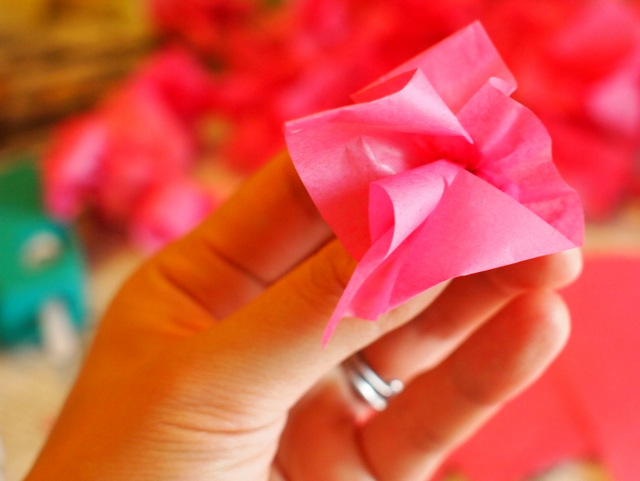
To make the flowers, simply crumple your tissue paper. My preschooler made two and then promptly gave up. I made the rest of them. He was much more interested in the next step.
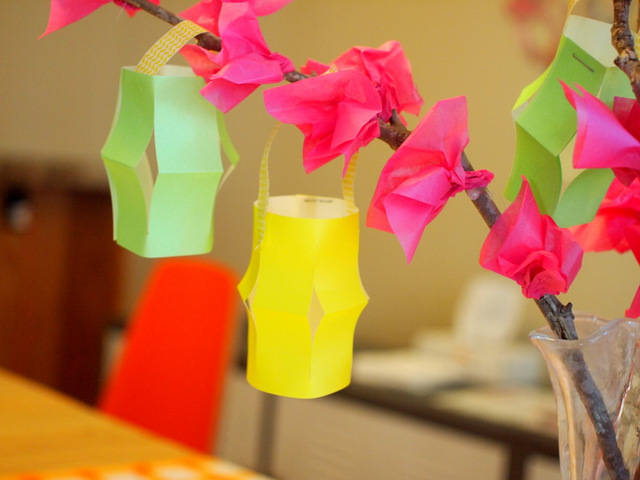
The hot gluing! Yup. I let him use the hot glue gun. To make sure we stayed safe and didn't burn ourselves... I placed the twigs in a vase first and then we glued the flowers onto them.
Here's how we hot glued with my preschooler:
- He dabbed on the glue while I pushed the flowers on. (This way only my fingers would touch the hot glue.)
- I told him to not touch the silver tip and keep the tip away from me.
- I gave him the mantra "touch, squeeze, and let go." I told him to touch the tip of the glue gun to the twig. Then, I told him to squeeze the gun and then let go and pull the tip off. That helped him a lot.
Here's how we made our paper lanterns:
I love the colors of Origami Paper. First, fold the origami paper in half. Then cut it. Now you have two rectangles to make two lanterns.
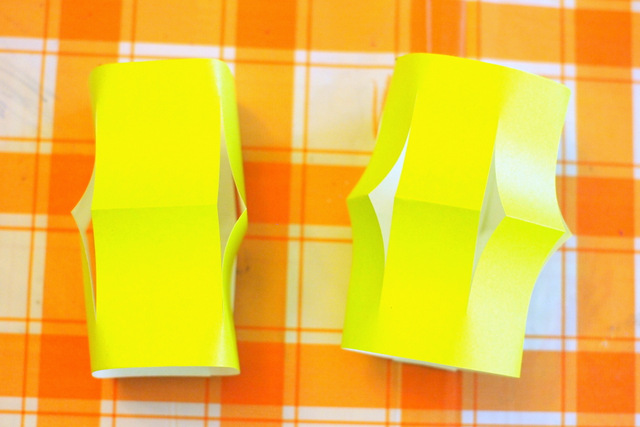
Fold a rectangle in half. Then, cut slits starting from the middle (folded portion). Your slits should not touch the outer edge.
Then, open up your paper and staple the lanterns shut. (I experimented with the distance between the cuts to find out which lantern design I liked the best.)
Then, I used washi tape to make the lantern's handles.
That's it! I hope you have fun making this beautiful craft with the kiddos. And if you're not too keen on letting your kid use the glue gun (or you have a whole class that you're teaching and don't want to deal with glue guns), try out my cherry blossom tissue paper art (with printable tree!) It's a really easy, easy way to do something quite similar and quite beautiful too!
.JPG)
Let's Keep in Contact!
Happy making, friends!


