This post contains affiliate links. Thank you for your support. For my full disclosure policy, click here
How to fold origami ladybugs:
Step1: (Optional) Fold your piece of origami paper like this. Then, cut out the four squares so that you can make tiny ladybugs. (Or, just use the origami paper as is to make a giant ladybug.)
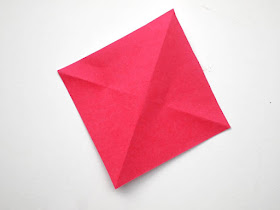
Step 2: Fold your paper along both diagonals. Open your folds up so that your paper looks like this.
Step 3: See one of the folded lines? Divide it into three in your mind. Place your fingers down to mark the thirds. Why? Well because....
Step 4: We're going to fold the top down so that it meets the spot of your lower finger (and covers 2/3 of the fold)
Step 5: Now fold the tip of your paper up so that it hits the horizontal halfway fold.
Step 6: Fold your paper backwards to hide the red triangle.
Step 7: Now you're going to fold back both sides of the paper in a slanted fashion to hide the corners.
Step 8: Now we're going to fold back both left and right sides so that they're straight.
Step 9: Now fold up the lower corner.
Grab a sharpie marker and some white circle stickers (or googly eyes) and have fun decorating!
To add a Valentine's twist on it. doodle a bug jar with a cute buggy saying and glue your ladybugs inside. (If you like my jars, you can get my "You're my best buggy" jars here. Small Bug Jars and Big Bug Jar)
Want more bug crafts?
Check out these links below!
Happy making, friends!
Pin It


