Here's how you Explode a Watermelon with kids!
Note: This post contains affiliate links. This means I make a small bit of change when you purchase items through the links. Thank you for your support and the grocery money! For my full disclosure policy, click here.
Materials Needed:
- Rubber Bands (We used around 300-400 3 1/2" x 1/4" Amazon rubberbands.)
- Personal Size Watermelon (We just got the small ones because the kids mostly did the activity)
- A small bowl (that fits nicely around the watermelon)
- A cutting board and knife (to eat the watermelon later- yummy science!)
- A clean surface outside
- Optional: Safety goggles (We don't own them. One of my sons wore swimming goggles, but you don't really need them.)
How to Explode a Watermelon with Rubber Bands:
1. Place your watermelon in a bowl.
2. Wrap your watermelon with rubber bands.
Things to note:
- Try to wrap your rubber bands around the same place. We did the activity two times. The first time we used 207 rubber bands. The second time it took around 340. We used similar sized watermelons and the same type of rubber bands. Why the difference? Wel,l the first time we placed the rubberbands tightly on top of each other. The second time we spread them out more (so our watermelon became a mummy-looking thing.)
- The watermelon begins cracking and oozing juice out before it actually pops. It's neat seeing the pressure building!
Here's a video of it popping!
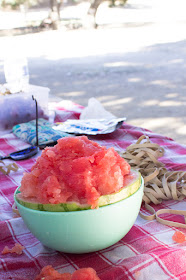
Here's what it looks like after it pops:
Some questions to guide your activity with kids:
1. Can a rubber band break a watermelon?
2. How many rubber bands do you think it'll take to break this watermelon?
3. What do you notice happening now?
4. What could we have done differently to change the number of rubber bands used?
I hope you try this activity out with your kids too!
Happy exploring, friends!
Pin It


