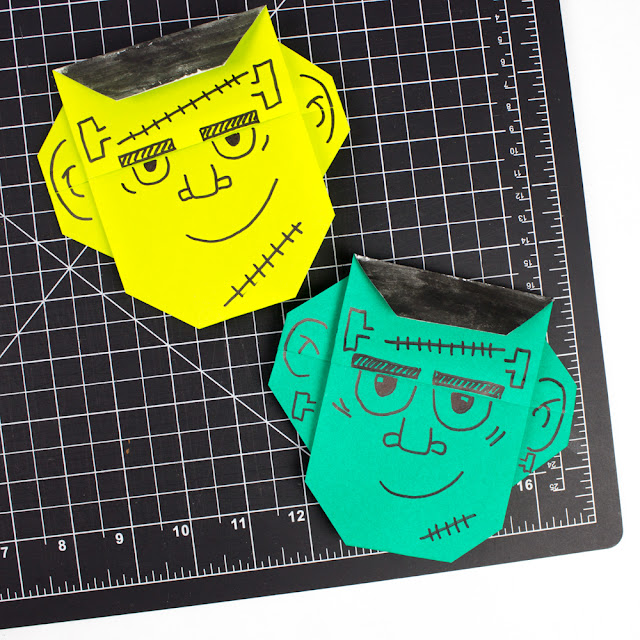
How to Fold an Origami Frankenstein Face
This post contains affiliate links. This means I make a small portion off of any purchases made through the links at no additional cost to you. Thank you for the grocery money! For my full disclosure policy, click here.
Full Disclosure:
This origami tutorial drew inspiration from this tutorial. I adopted the directions by losing the cool zig-zag hair and adding ears. So if you want to try another version of Frankenstein origami, definitely check those directions out.
Let's Fold!
Step 1:Grab a sheet of Origami Paper. Fold it along its diagonal like this.
Step 2:
Open the paper up and fold it like this. (You've now created Frankenstein's furrowed brow.)
Step 3:
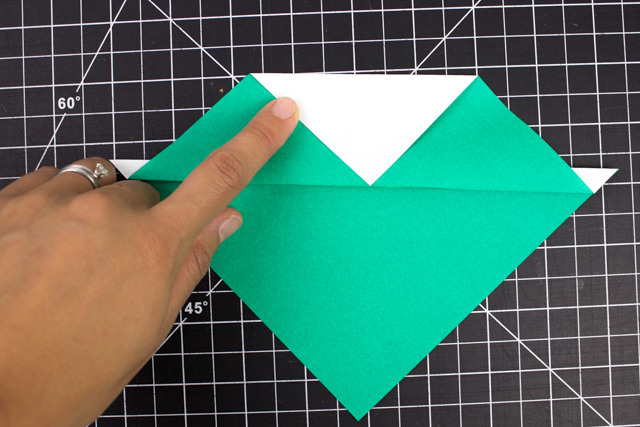
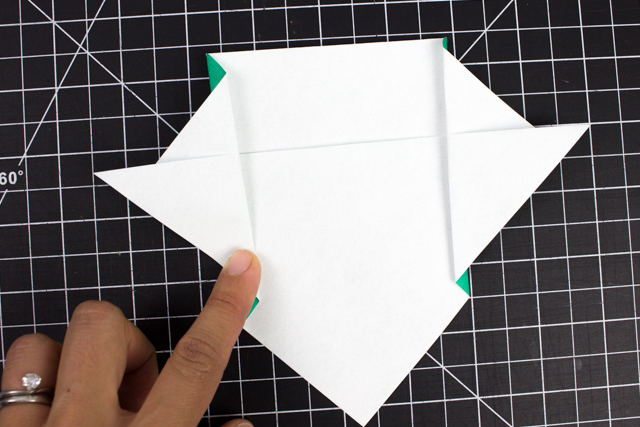
Now we're creating the monster's hair.
Fold the top portion of your paper down so it touches the crease like so:
Step 4:
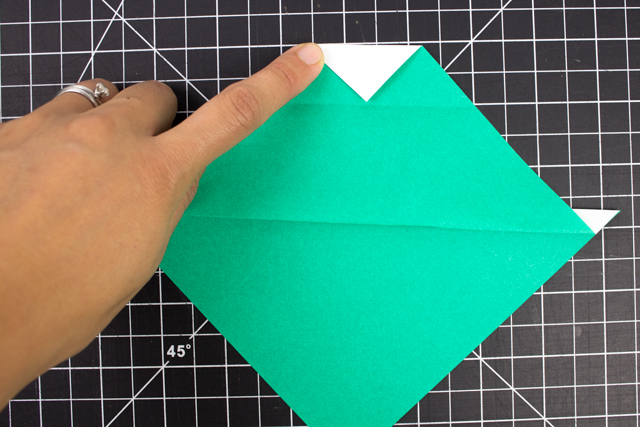
Undo the fold.
Then fold the top tip down to the crease made in the previous step.
Step 5:
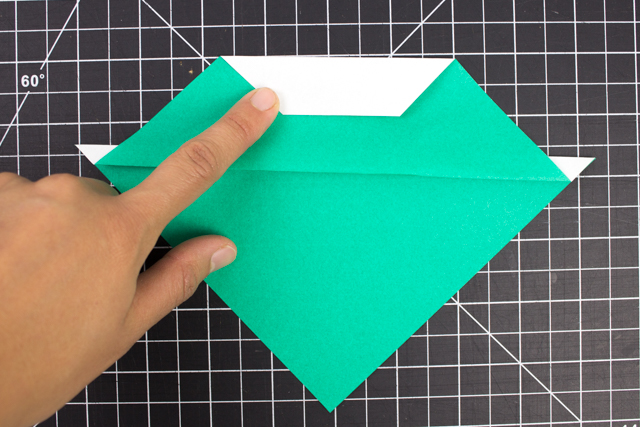
Fold the paper down along the crease made in step 3.
You've now finished the hair!
Step 6:
Now we're going to fold the ears.
Flip your origami over.
Then fold over both sides like so to create the sides of the face.
Step 7:
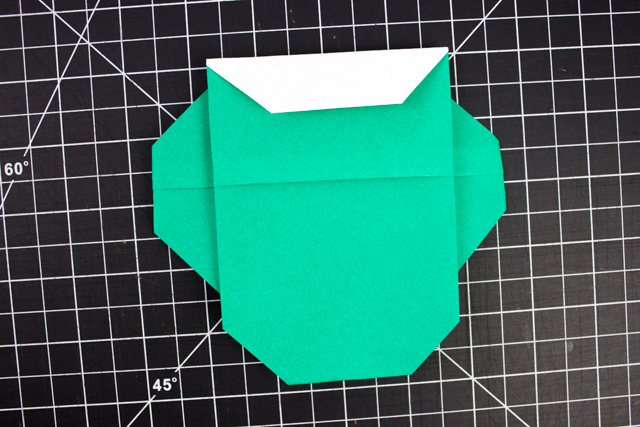
Then, lift up your sides and fold them out like so:
When you flip your paper over you should see this:
Step 8:
Now fold both left and right sides back to create ears.
Also, fold the bottom corner up to create a chin.
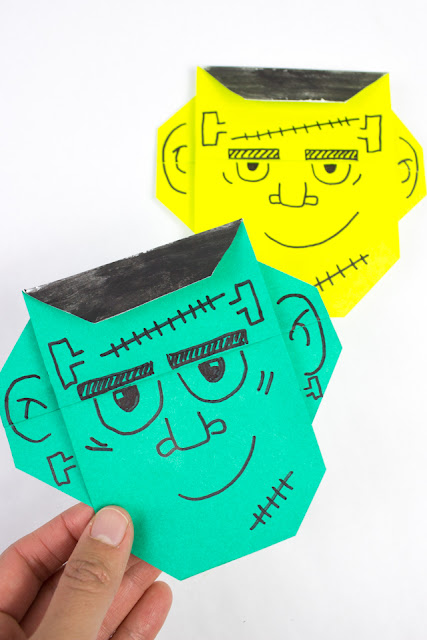
Grab your drawing supplies (we used Black Sharpie and a black Kwik Stix) to draw the face.
And that's it!
6 More Halloween Origami and Kirigami:
If you're interested in a little more complicated Halloween Origami, I definitely recommend this Horrorgami book. It's got a ton of creepy cool paper folding ideas!
Or, check out these links below for more Halloween-themed paper folding and cutting fun!
- Origami Witch's Claws
- Cute Cat, Pumpkin, and Cat Kirigami
- Easy Halloween Paper Chains
- Origami Vampire Lips
- Origami Jack-O-Lanterns
- Origami Black Cat
Spooky folding, friends!

