How to Fold Sweet and Simple Origami Paper Dolls with Kids
This post contains affiliate links. This means I make a tiny bit of grocery money from each purchase made. Thank you for your support! For my full disclosure policy, click here.
Inspired by Spring, cherry blossoms, and my lifetime love with all these kawaii and Japanese, I came up with the design for these little paper dolls the other night. And I fell in love with them.
They're so cute!!
And here's how you make them!
Materials Needed:
- Origami Paper (I like this brand a lot because there is a variety of colors AND they are not colored on both sides. I've purchased a couple of other types from Amazon that weren't white on one side and that totally bummed me out.)
- Scissors
- Random stickers (I love using colorful circle stickers!)
- Makers (I used Sharpies because they don't smear)
- Tape
- Washi Tape (It's time to pull out the collection!)
How to fold a Paper Doll Head:
Step 1: Fold you paper in half and then in half again to create 4 identically sized squares. Cut out the squares. Each little square will make one paper doll head.
Step 2: Fold down one side of the square. (This will be your bangs.)
Step 3: Fold both sides in.
Step 4: Fold back your two top corners.
Step 5: Fold back your bottom side.
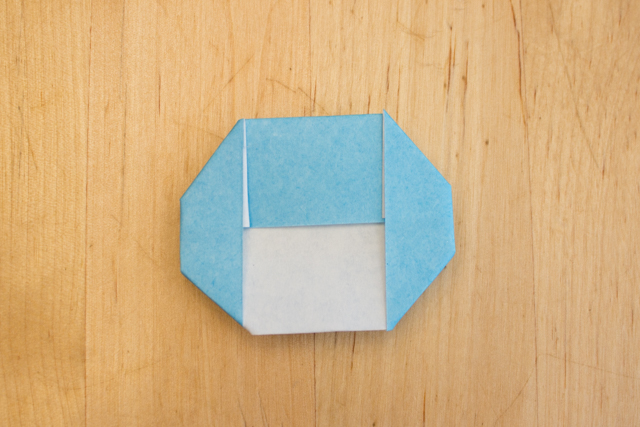
Step 6: Fold back your two bottom corners and you've got a cute paper doll face!
How to Fold an Easy Origami Paper Doll Body:
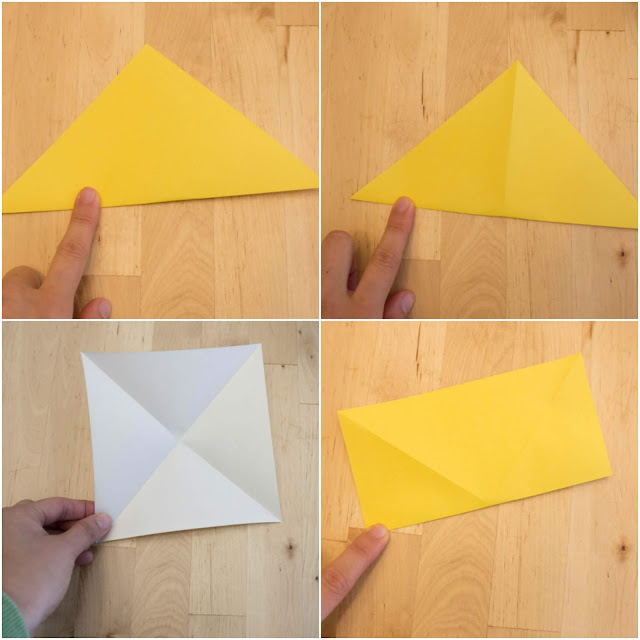
Step 1: Fold the paper along a diagonal.
Step 2: Unfold your fold and then fold again along the other diagonal.
Step 3: When you open up your paper you should see this. (We did these initial steps to help with a trickier step later on.)
Step 4: Fold the paper in half.
Step 5: Fold the rectangle in half again to make a smaller square shape.
Step 6: Remember those initial diagonal folds we made before? Here's where they come in use! Put your hands into the open side of the your mini square. Push down....
Step 7: Keep pushing down and your paper should collapse into a triangle shape.
Step 8: Do the same thing (Steps 6+7) to collapse the other side into a triangle shape.
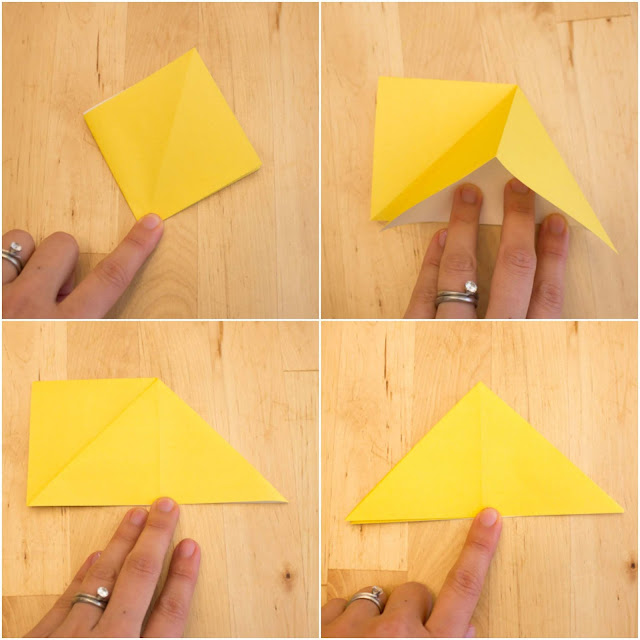
Step 9: Fold up the left and right corners of the top triangle.
Step 10: Take your top right triangular flap and fold it over to the left.
Step 11: Fold the side of the larger back triangle over so that the slanty side meets the middle.
Step 12: Return the flap that you moved in step 10 back to its original place.
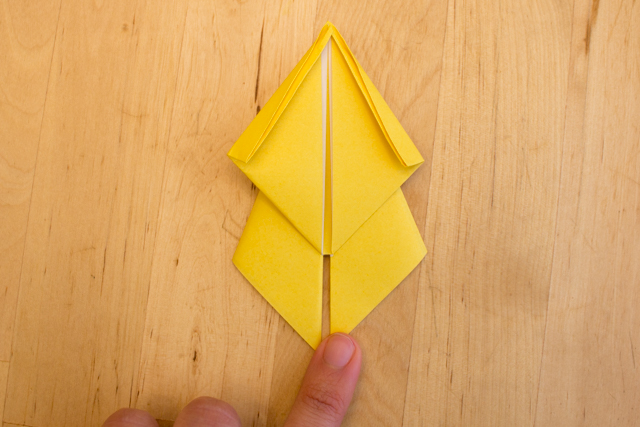
Step 13: Repeat steps 9-12 with the other side. You should now see this.
Step 14: Fold down the two top sides (to make your doll's arms a bit more slender.)
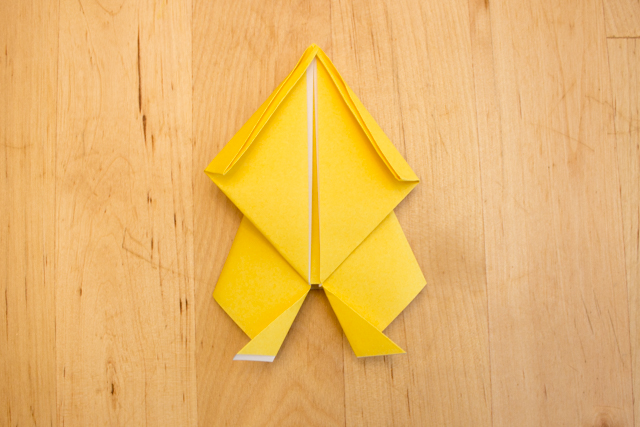
Step 15: Now fold the bottom two corners like this to create little paper doll feet.
Flip your paper over and you'll see this cute origami paper doll body!
Decorate and tape your head and body pieces. If you want, cut slits into your doll's bangs to create paper "hair."
And you're all set!
By the way, I didn't mention it before, but these paper dolls also function as finger puppets too!
If you liked this post, be sure to check out my favorite 50 Cute and Colorful Origami and Kirigami Projects for kids!
I hope you enjoy making these sweet dolls.
And if you want to keep the good times going, check out these nifty origami Pokemon!
(They're made using the same body as these dolls!)


