Showing posts with label felt. Show all posts

Tuesday, November 5, 2019

Yarn Pinecone Owl Craft (And 8 Awesome Owl Books!)

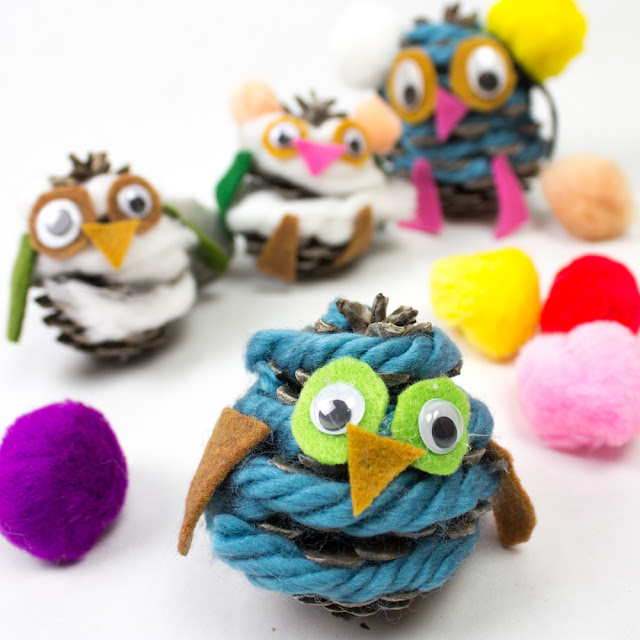
Are you fully embracing fall and all types of Fall Crafts? It doesn't get very cold over here in California, but chilly mornings and nights do make it feel more fall-ish. A couple of weeks ago I saw these super cute yarn pinecone owls over on  Squiggle Dot and Squeeze's IG feed and was inspired.

So today I'm sharing our adorable pinecone owls. They're sweet and wooly and the perfect cozy craft for fall!  You also probably have all the materials needed right at home. (And in case you're looking for some fun owl books, I've also included a list of our favorite owl books down below too!)

How to Make Cozy Pinecone Owls with kids


How to Make Fun Felt and Yarn Pinecone Owls for fall AND a great Owl booklist for kids too!

This post contains affiliate links.  This means I make a small bit of money for any purchases made through the links at no additional cost to you.  Thank you for your support.  For my full disclosure policy, click here.


Tuesday, May 14, 2019

DIY Cute Tiny Felt Succulents

Aren't these tiny felt succulents adorable?  I went to a class a while back learning how to make these.  My sons thought they were so cute and my eldest wanted to make some too.  So today I'm sharing how to make these cute faux felt plants! They're perfect to use for pretend play or as cute decor around the house.

Super Sweet Felt Succulents


how to make tiny felt succulents with kids- super cute craft that also makes a great DIY gift

This post contains affiliate links.  This means I make a small bit of money for any purchases made through the links at no additional cost to you.  Thank you for your support.  For my full disclosure policy, click here.


Monday, May 6, 2019

No-Sew Felt Drawstring Pouches

Looking for an easy, summer camp craft?  Or, do you have a child who loves collecting little toys or coins?  Or, are you looking for a sweet way to hold teeth for the Tooth Fairy?   Or, are you looking for a crafty way to teach about math and circles?

Well, today's super easy felt craft is the perfect craft for you.  We're making super easy, no-sew felt drawstring bags!

No-Sew Kid Made Pouches!

No sew felt drawstring bag- such a fun kids craft for holding small collections, coins, or even tooth fairy teeth!

This post contains affiliate links.  This means I make a small bit of money for any purchases made through the links at no additional cost to you.  Thank you for your support.  For my full disclosure policy, click here.


Sunday, February 3, 2019

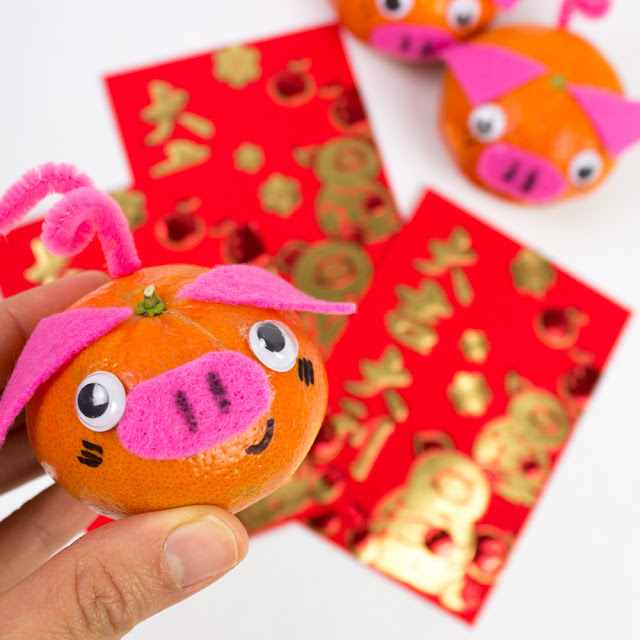
Cute Mandarin Pig Craft (For Chinese New Year!)

Hosting a Chinese New Year event and looking for a super cute Chinese New Year Craft that also doubles as decor?  This is it!  Halos Mandarins recently reached out and challenged me to make a craft using their fruit.  Well, these adorable mandarin pigs definitely fit the bill.  These sweet pigs are a yummy and cute way to celebrate the Year of the Pig.

(Many thanks to Halos for sending me craft supplies and boxes of yummy mandarins!)

Super Sweet Mandarin Pigs for Chinese New Year!


Adorable Mandarin Orange Pig Craft for Chinese New Year


Thursday, July 26, 2018

Super Easy and Cute Turtle Glove Puppet

Who loves turtles?  Here's an easy way to turn an old glove into a cute turtle puppet!  My youngest son loves puppets of all sorts, so I whipped this turtle puppet up during naptime.  Here's how I made it!

Super Easy and Cute Turtle Puppet 


How to make a glove turtle puppet craft with kids!


Note:  This post contains affiliate links.  This means I make a small bit of change when you purchase items through the links.  Thank you for your support and the grocery money! For my full disclosure policy, click here.

Saturday, November 19, 2016

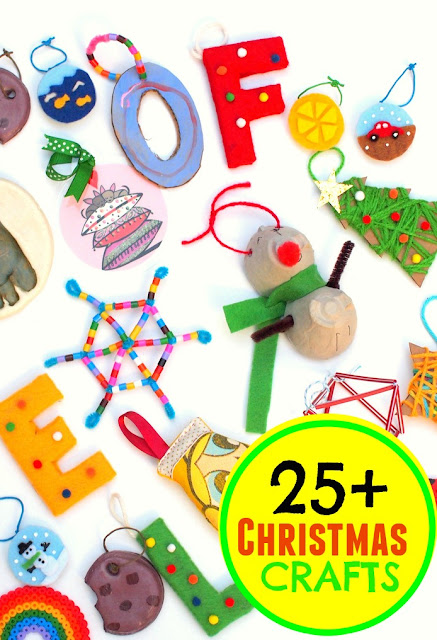
25+ Christmas Crafts and Activities to get you through December!

Does your family start celebrating Christmas the moment Thanksgiving is over? My son insists that we put up our tree right after our Thanksgiving meal!  In case your family is like ours, I'm sharing this fun list of 25+ favorite Christmas activities and crafts.   So go ahead and peek around.  You can do an activity everyday in December- like a crafty advent of sorts!

over 25 family friendly and fun Christmas crafts and activities


Tuesday, June 28, 2016

Summer Camp No Sew Felt Pillows

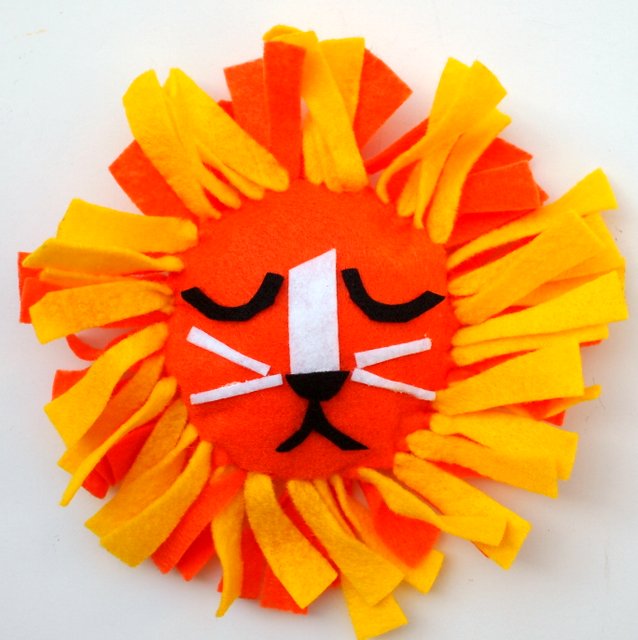
It's time for another easy summer kids craft! Awhile back I tried out a box from Little Loving Hands and made a cute no-sew felt tie heart pillow with my son.  It was so fun making that easy pillow that we made another!  Today I'm sharing these two adorable no-sew felt lion and sun pillows!

Here's the lion pillow....

no-sew felt lion tie pillow for kids


Saturday, February 27, 2016

Easy Shamrock Headband for St. Patrick's Day

Who needs leprechauns when you have a preschooler running around? Ha!  Here's a fun and easy weekend St. Patrick's Day craft:  Shamrock headbands!   You can find my full tutorial over at DIY Candy today!


Happy weekend and happy making, friends!

Make an easy shamrock headband for St. Patrick's Day


Wednesday, October 15, 2014

Rabbit Pop-up Puppet

Today I'm living out my secret (or now, not so secret) fantasies to be a magician with this fun pop-up rabbit puppet.  Simply push the stick and a rabbit pops out of a magician's hat!


DIY Pop Up Rabbit Puppet


To see how I made this handmade toy, visit Handmade Charlotte.

Happy Wednesday!

Sunday, July 13, 2014

DIY Felt Shape Activity

Are you looking for a fun, open-ended, creative activity to do with the kids?  Then this DIY Felt Shape Activity is right up your alley!  It's easy to make and provides kids with countless opportunities to be creative, use their imaginations, visualize things spatially, and practice using their mathematical language!    

DIY Felt Shape Activity

DIY Felt Shape Activity:  Use different shapes to create scenes!


This post contains affiliate links.  Thank you for your support!


Tuesday, April 15, 2014

DIY Easter Bunny Bean Bag Toss

Tomorrow the theme is bunnies at our library toddler group.  We're going to make paper bag bunnies and play a bunny game too.  Since I already had this lovely large piece of cardboard, I made a really simple Cardboard Easter Bunny Bean Bag Toss game.... complete with... wait for it... carrot bean bags.  

DIY Easter Bunny Bean Bag Toss

DIY Easter Bunny Bean Bag Toss


Ack.  Too adorable.  Too adorable!  (Btw, is it strange that I swoon over large pieces of cardboard?)   Hrmm... anyway... hopefully the kids will have fun playing tomorrow.  But even if they don't, I'm just going to lug this guy home and prop him up against my wall.   His cheesy grin is just too cute. 

Keep reading to see photos of how I made it...

Friday, December 13, 2013

Make a felt and cardboard gingerbread house

Today's craft was inspired by gingerbread houses.  It's a little cardboard and felt "gingerbread" house with felt "candy" decorations. Pretty neat, right? All the decorations can be easily placed on and taken of, so you can decorate and re-decorate to your heart's content.

DIY Felt and Cardboard Gingerbread House Toy

DIY Felt and Gingerbread House Toys


This post contains affiliate links. Thank you for your support.

If you'd like to make your own, keep on reading!

Monday, December 9, 2013

Make Homeamde Felt Milk Jug Cap Ornaments


Each year I try to make a couple of handmade ornaments for our tree.  Last year, Chuck and I made these hand and feet salt dough ornaments.  I would have made him a new set this year... but his feet are so big that the ornaments would end up being the size of small plates.

So instead, this year I turned a bunch of milk jug caps (gifted to me by a craft-loving aunt- thanks!) to make these mini felt ornaments.  Each one has a different design and they came out so colorful and cute.... I just want to eat them up.   But don't worry, I won't because they're made of felt...and glue...and plastic...

Can you guess which one is Chuck's favorite?  Keep on reading to find out... 

Wednesday, December 4, 2013

Homemade gift: DIY Felt Board

Do you remember playing with felt boards as a kid?  (Is that too old school?  Maybe kids nowadays play with fancy touch screens instead ... hrmm....)  Anyway, I remember using a felt board in school and LOVING it.   So I thought I'd try making a homemade felt board for Chuck. After consulting a couple of tutorials online, here's what I came up with:

Let's make a DIY Felt Board

how to make a DIY Felt Board


(This post contains affiliate links.  Thank you for your support!)

Now, in full disclosure, I wish I could say that Chuck loved it and played hours and hours with it while I took a nap on the couch.  Errrm.....  It didn't quite turn out that way.  He played with the car parts for a bit, but then seemed much more interested in rolling around real cars.

But I won't call this a craft fail just yet.  I'm hoping (cross your fingers!) that he'll grow to love the felt board as much as I did.  But if not, no big deal.  The entire thing only cost about 4 dollars to make because I already had most of the materials lying around the apartment.  Score!

Now if you have a felt-loving child in your life, you can try making your own felt board too!  (I bet it would make a great Christmas gift.)  Here's how I made mine:

Materials to make a DIY Felt Board:


Directions to make a DIY Felt Board:

1.  Clean your work area.  Felt attracts stuff.  (I worked on the floor, so I swept it first.)

how to make a DIY Felt Board
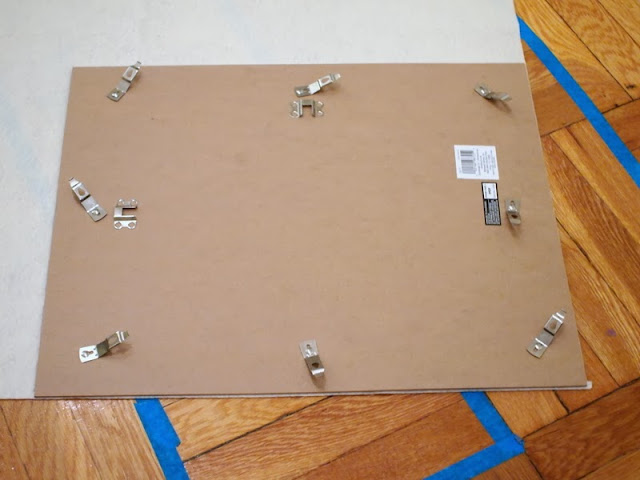
2.  Take out the back of your photo frame.  Discard the glass.  Place the back on your piece of felt and trace it.  Cut the rectangle out.

3.  Optional:  If your felt is a bit wrinkly, carefully iron it.  (I turned my iron to a lower setting and placed one of those protective ironing pressing pads over my felt before ironing it so I wouldn't melt or burn the felt.)

Glue on your felt
4.  Place your piece of felt directly over the photo frame back.  Make sure the sides all line up.  To help with the gluing, fold one side of the felt over the other.  Then, use your sponge brush and brush a bit of Mod Podge right next to the fold.   Press the fabric down over the glue.  Then, spread a little more Mod Podge next to your new fold and press the felt down again.  Keep repeating this procedure until one side is fully glued down.  Then, repeat the procedure with the other side.  

5.  Once the Mod Podge dries, put your board back into the frame.  That's it!

Now comes the fun part- making your felt pieces.  Doodle your designs onto paper.  Then, trace them onto felt and cut them out.  I chose to make a set of Christmas tree felt pieces and a set of car part pieces.
Homemade Felt Board Tutorial
Happy crafting!

DIY Felt Board Tutorial

Tuesday, July 23, 2013

Make a hockey stick hobby horse and dragon

Did I make a hobby horse from a hockey stick?

Yup.

And why stop there?  Why not make a hobby dragon too?

Rawr.


Friday, February 15, 2013

Valentine's Day

I hope you had a good Valentine's day.
We celebrated with a party at the library and a quiet dinner at home. 


Monday, September 24, 2012

DIY Felt Flower Lapel Pin / Boutonniere

It's official!  Fall is now upon us.

With cooler temperatures rolling in, Hubby, Baby Chuck, and I are changing up our wardrobes.  We're putting on long sleeve shirts and pants, no longer shaving our legs (oh wait, that's just me- tmi?), putting on shoes instead of sandals (goodbye sandal tan), and wearing jackets.

Hubby been looking forward to fall ever since we've moved back east because he loves wearing jackets to work.  As a serious lover of all things stylish, he's also hinted that he'd love some small flowers to adorn his lapel (as seen here.)  I peeked around the internet for inspiration and then set out to make him some felt flower lapel pins.      

Here are the materials I used:
- freezer paper
- good scissors
- pencil
- felt in an assortment of colors  (*See note below) 
- iron
- hot glue gun
- bobby pin(s)
- needle and thread

*Note:  I bought cheap polyester felt from the craft store.  (30 cents a piece?  You just can't beat that price.) You would definitely get a more polished look if you purchased nicer wool felt.  We initially created these pins as mockups, thinking that we'd create real ones with wool felt later on.  But, the pins came out so nice that we just decided to use them.  How long will the pins last?  Will they quickly look ratty?  I'm not sure.  Let's see what happens once hubby starts wearing them to work.


Step 1:  I created a flower pattern that was kind of Van Cleef & Arpels meets Orla Kiely.  I traced that pattern onto freezer paper and ironed it (waxy side down) to adhere the paper to my felt.  This process make it easier to cleanly cut my tiny felt shapes out.  (Special thanks to Make It Cozee for the tip!)
Step 2:  I cut out my flower shapes, circle shapes (flower centers), and square shapes (flower backs).

Step 3:  I used a hot glue gun  (it was my first time using one!!!) to glue the squares onto the flowers.  I did this so that my flowers pins would feel a bit more substantial, since I used cheapy felt.  Plus, I didn't want my stitches (step 4) to be visible. 

Step 4:  After the glue dried, I sewed a bobby pin to each square, making sure to not sew through the front of the flower.

Step 5:  I hot glued a circle to each flower to complete my little garden of felt flower lapel pins.

Here's how the pin looks on hubby's jacket.  I just slipped the bobby pin through the lapel buttonhole.  (Note:  I had to cut the hole first because it was sewn shut.)


I think the pins came out super cute and add just the right touch of whimsy.  They'll definitely spruce up hubby's work outfit.  Hmm, but why stop at just work outfits?  I bet these little guys would also look really cute as wedding boutonnieres too... don't you think?