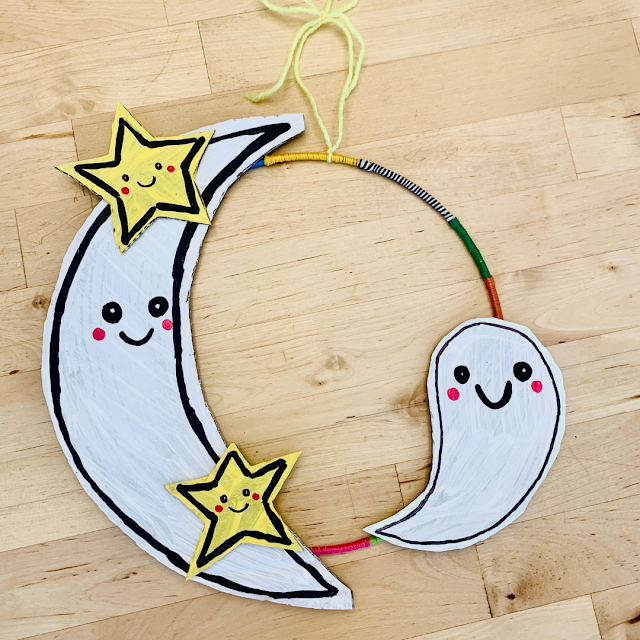
If you're looking for a super sweet and cute cardboard Halloween craft.... this is it!
Showing posts with label space. Show all posts
Showing posts with label space. Show all posts
Thursday, September 30, 2021
Wednesday, March 24, 2021
Moon and Star Dried Flower Suncatcher
Spring is finally here! Anyone else love this season? The longer days and warmer weather definitely help to brighten my spirits. We've shared a ton of spring crafts over the years and today's is an oldie, but a goodie. We're making celestial suncatchers using contact paper!
Moon and Star Dried Flower Suncatchers
Note: This post contains affiliate links. This means I make a small bit of change when you purchase items through the links. Thank you for your support and the grocery money! For my full disclosure policy, click here.
Thursday, April 12, 2018
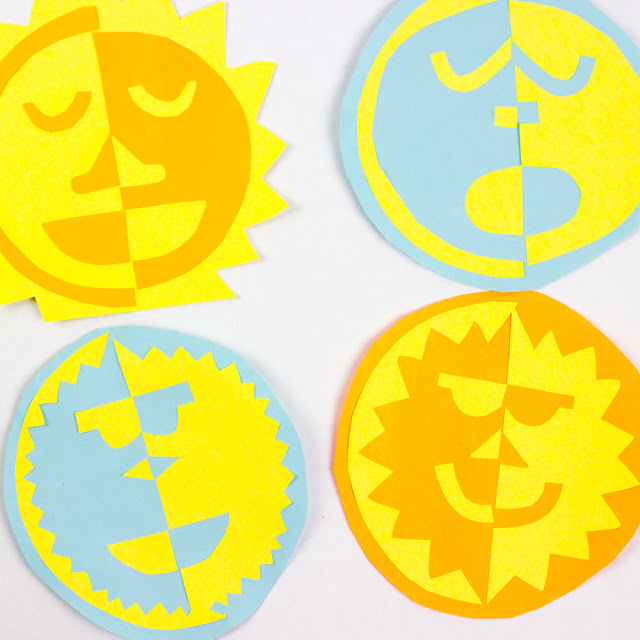
Positive and Negative Space Suns and Moons
It's sunny! It's sunny! After a week of rainy and grey skies, we are LOVING the warm, sunny weather. I've seeing so many cool positive and negative space art projects online that I wanted to try making some with my son too. And then it hit me- why not cut out positive and negative sun and moon faces? Well, here are the results from our paper experimentations. (Aren't the faces fun?)
Note: This post contains affiliate links. This means I make a small bit of change when you purchase items through the links. Thank you for your support and the grocery money! For my full disclosure policy, click here.
Positive and Negative Space Suns and Moons
Note: This post contains affiliate links. This means I make a small bit of change when you purchase items through the links. Thank you for your support and the grocery money! For my full disclosure policy, click here.
Tuesday, December 20, 2016
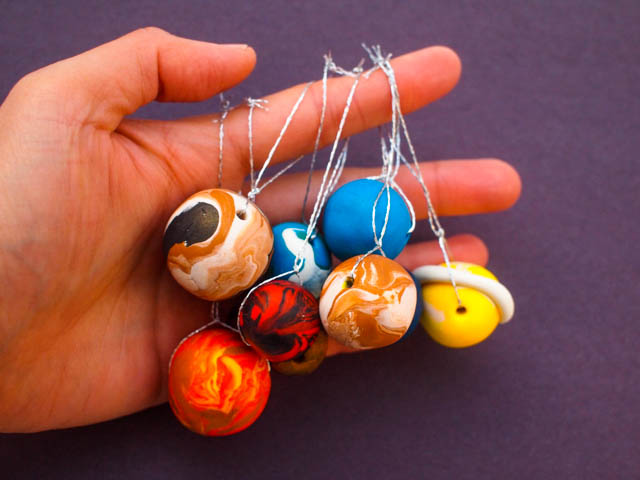
DIY Outer Space Planet Ornaments for Christmas
Christmas is right around the corner. Most likely your tree and home are already completely decorated. My deepest apologies, friend, but I'm throwing a wrench in your plans. (Muah ha ha ha!) Here's one last STEM inspired Christmas Craft that you'll want to try out this year. If you love space, you'll love making these Outer Space Planet Ornaments. (They're out of this world!)
This post contains affiliate links. Thank you for the grocery money! For my full disclosure policy, click here!
Thursday, August 11, 2016
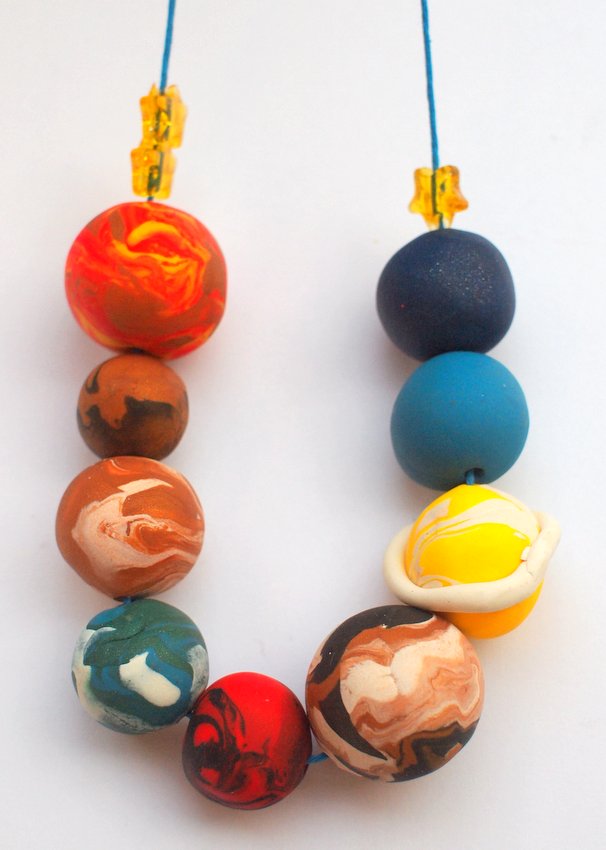
Outer Space Kids Jewelry
As a kid I adored watching Ms. Frizzle. Her crazy hair, her awesome outfits, her magic bus, her love of science... gosh. What wasn't there to love? Well, today I'm sharing this awesome STEM inspired craft. We're tapping into our inner science nerds and making some space inspired jewelry with the kiddos! (Ok, who am I kidding... this would be an awesome craft for any space-loving adults too!)
How to Make Outer Space Planet and Galaxy Jewelry
This post contains affiliate links. Thank you for the grocery money! For my full disclosure policy, click here!
So grab your Sculpey Clay, favorite Magic School Bus books, and visit DIY Candy today to learn how to make your very own spacey clay jewelry!
More Space Themed Crafts
Happy making, friends!
Friday, May 15, 2015
Pie Plate Solar System
We love space themed crafts! Do you? Today's Creative Preschool Collaborators theme is space. This means that 4 other bloggers and I will share 5 super fun solar system crafts! So be sure to scroll down to the bottom of this post to see everyone's ideas!
We've been studying how the earth revolves around the sun. So we made this pie plate solar system game!
We've been studying how the earth revolves around the sun. So we made this pie plate solar system game!
Pie Plate Solar System
This post contains affiliate links. Thank you for your support!
Sunday, April 5, 2015
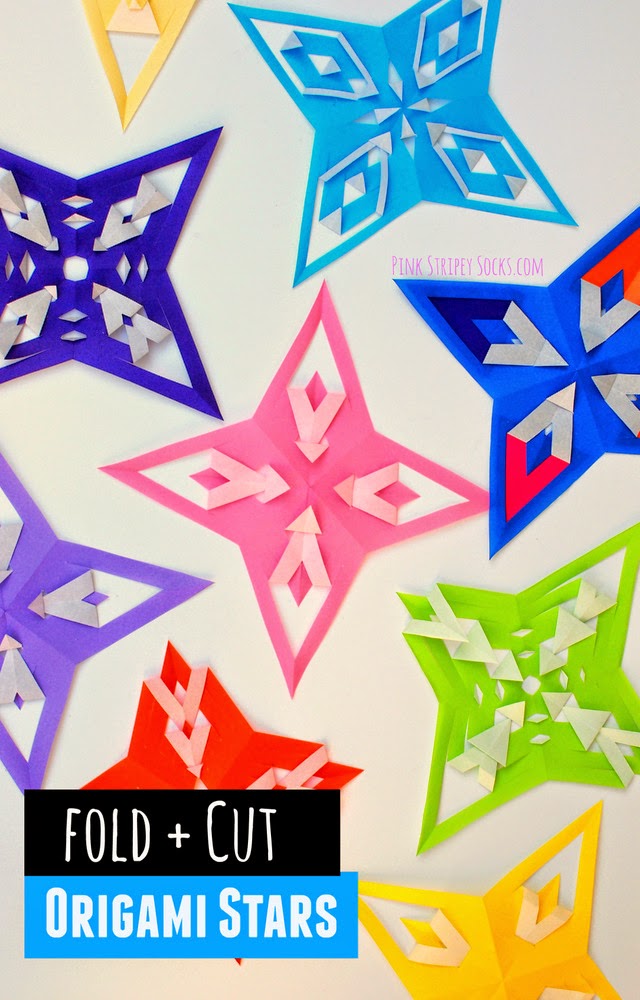
How to Fold and Cut Origami Stars
Lately I've just been digging Origami projects. There's just something so relaxing about folding paper to create lovely things. For today's post I wanted to share a recent origami project- these folded and cut origami stars. They are really, really beautiful and of course, super simple to make! (I'm an origami newbie, so if I say it's easy... it's totally doable!)
So keep reading to see how I made them.
Oh yeah. Guess what? I took the plunge and actually shot videos of me folding the paper and explaining my process. I know, I know. Video is a completely new medium to me and I still have a lot of kinks to work out (like how to make things brighter!) But, I think the videos explain the process better than the photos. So I've included them in the post.
How to Fold and Cut Origami Stars
This post contains affiliate links. Thank you for your support!
So keep reading to see how I made them.
Oh yeah. Guess what? I took the plunge and actually shot videos of me folding the paper and explaining my process. I know, I know. Video is a completely new medium to me and I still have a lot of kinks to work out (like how to make things brighter!) But, I think the videos explain the process better than the photos. So I've included them in the post.
Tuesday, January 27, 2015
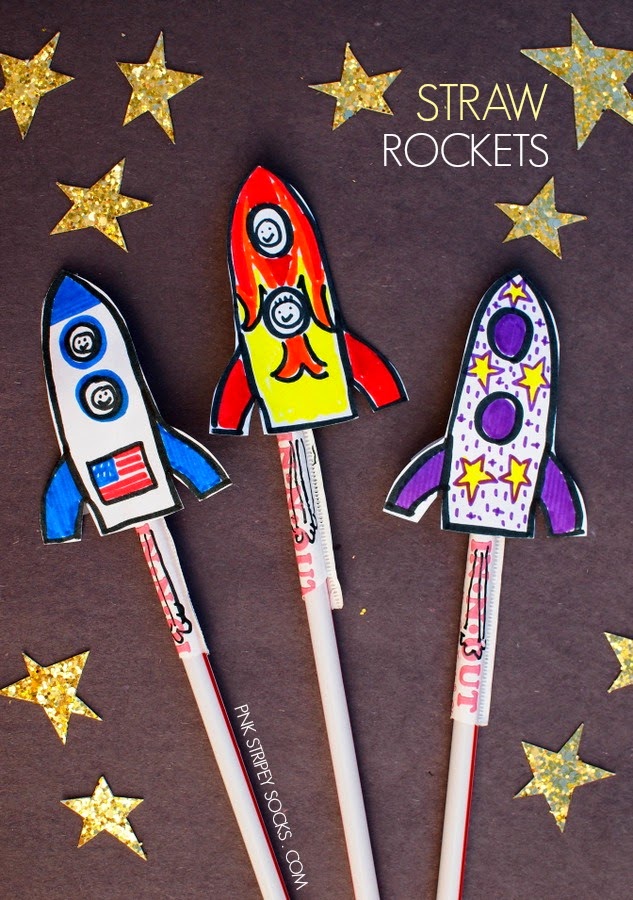
Straw Rockets
My preschooler still absolutely LOVES rockets and space shuttles. Over the years, we've made a lot of awesome transportation crafts, but I was excited to post these straw rockets today because they were easy to make (and FREE)!
Easy Straw Rockets
This post contains affiliate links. Thank you for your support!
Wednesday, October 29, 2014
Star Finding Game
Recently Chuck started getting the concept of hide-and-seek. I'm so stoked about that and love playing it with him at the park. But we've had to cut our park time down with the days getting shorter. Boo! To help pass the time at home, we've tried doing activities that embrace the dark. So far we've made our bike wheels glow in the dark and even given ourselves glowing temporary tattoos. Here's another way that we've entertained ourselves- we've played some Star Hide-And-Seek.
Star Hide-and-Seek Game
This post contains affiliate links. Thank you for your support!
Friday, October 24, 2014
Glow in the Dark Moon Shirt
My son loves pointing out the moon at night. Today I'm over at DIY Candy sharing how I made him this adorable glow in the dark moon shirt.
(By the way, did you see the solar eclipse yesterday? We totally missed it. Ack!)
And if you really like glow in the dark crafts, here are some more from the archives!
DIY Glow in the Dark Moon Shirt
(By the way, did you see the solar eclipse yesterday? We totally missed it. Ack!)
And if you really like glow in the dark crafts, here are some more from the archives!
Other glow in the dark crafts:
Have a great weekend, friends!
(Remember, you can always find other fun ideas on my Pinterest, Facebook, Instagram, or Twitter accounts!)Tuesday, October 21, 2014
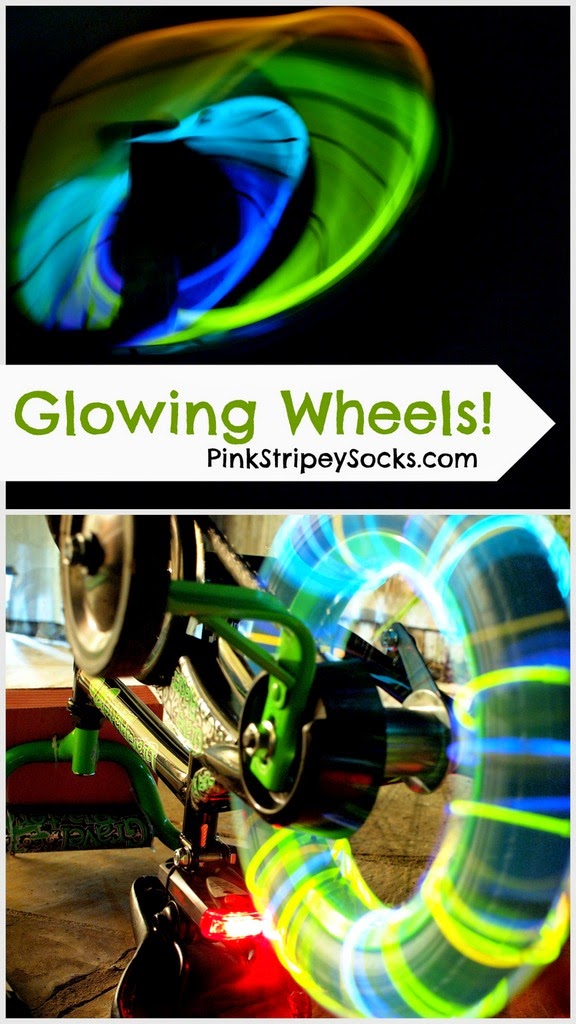
Make your wheels glow in the dark! (And create some lovely modern art too!)
Do you like playing with glow sticks? I love fall, but gosh, it gets dark outside so quickly! I hate being cooped up inside. What's a mom to do at night? Well, we've tried embracing the dark by making a DIY Glowing Jellyfish Costume and drawing glowing designs on our skin. Recently we also brought out our glow sticks and wove them into the wheels of Chuck's bike. (I was inspired by Meri Cherry's awesome glow in the dark Dancing Ballerina Tutus!)
The activity was a hit!
Yup. This was a super easy activity that didn't cost very much to do and required very little set up Plus, it got us outside and we made some beautiful glowing art.
Yup, you could say that the activity gets "glowing reviews" from our whole family? Get it? Hee hee hee.
Ok. Here's what we did!
The activity was a hit!
Make Glow in the Dark Wheels!
This post contains affiliate links. Thank you for your support!
Yup. This was a super easy activity that didn't cost very much to do and required very little set up Plus, it got us outside and we made some beautiful glowing art.
Yup, you could say that the activity gets "glowing reviews" from our whole family? Get it? Hee hee hee.
Ok. Here's what we did!
Friday, October 10, 2014
How did I make my skin glow?
Looking for an easy way to entertain the kids this weekend?
How about making their skin glow?
This post contains affiliate links. Thank you for your support!
Yurp. It's 1:30 AM here and I should be sleeping. But I'm not. Why? Well, I couldn't because all my craft juices were flowing after seeing this tutorial.
Did you know that you can make your skin glow... with only 2 materials? I had to try it out for myself. So I took a highlighter and black light
Can you guess what Chuck and I will be doing this weekend?
Hope you have a great weekend!
Tuesday, March 18, 2014
Cardboard Space Shuttle Craft (template included)
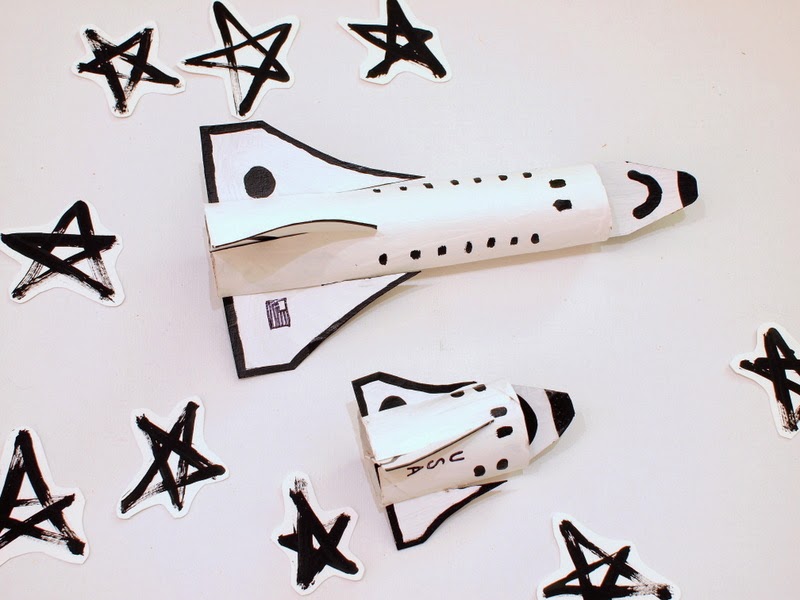
A couple of weeks ago we visited our nearby Science Center and Chuck fell in love with a small space shuttle toy. Of course, the wheels in my head began whirring and I knew that we could easily transform a paper towel roll into our very own rocket ship. So after a couple days of planning, cutting, and painting, we are now the proud owners of two cardboard roll space shuttles:
Want a ride to the moon on your very own cardboard roll space shuttle? Then keep reading to see how we made them (template included)!
Cardboard Space Shuttle Craft
Want a ride to the moon on your very own cardboard roll space shuttle? Then keep reading to see how we made them (template included)!
Tuesday, December 31, 2013
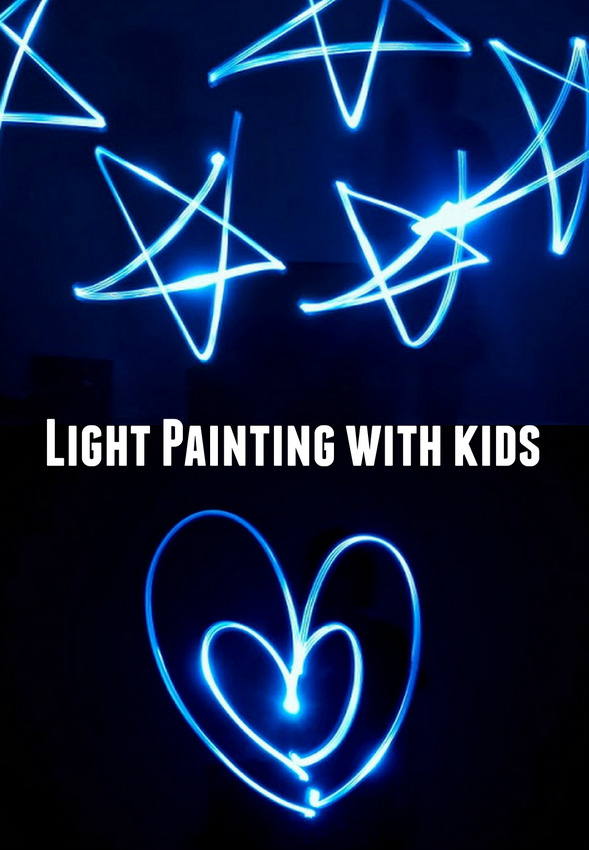
Light Painting with a Flashlight
Hubby and I love seeing things glow in the dark. We've taken photos with glow sticks (and then cut them up to see what was inside- muah ha ha), made our Christmas lights look like different shapes, and even made glow-in-the dark chalk.
This past Christmas our uncle gave us his old tripod (Thanks Tito Ric!), so hubby wanted to try light painting. We basically just waved around a flashlight in the air to make lovely "drawings" in the dark.
This past Christmas our uncle gave us his old tripod (Thanks Tito Ric!), so hubby wanted to try light painting. We basically just waved around a flashlight in the air to make lovely "drawings" in the dark.
Wednesday, November 6, 2013
Star Painting (using Contact Paper)
Lately the cooler temperatures and shortened daylight hours have me looking at the sky to find stars. However, since we live in a well-lit, urban environment, star gazing isn't really a viable option.
So once again I felt the urge to make some star-inspired artwork. If I can't see stars in the sky, then I'll just have to make my own to enjoy. Now, if you've been following this blog for some time, you'll recall that this isn't the first time I felt drawn towards the stars. Last year I placed a galaxy of cardboard stars on our living room wall. Then earlier this year I painted the inside of an umbrella to look like a galaxy. This time I took a simpler approach and made myself some star artwork using contact paper.
Materials:
Directions:
Quick and easy, right? Just remember to make sure that your contact paper stars are completely stuck on tight. Eeek! See that leftmost star below? The paint bled through because the contact paper wasn't sticking to the canvas properly.
Happy star crafting!
So once again I felt the urge to make some star-inspired artwork. If I can't see stars in the sky, then I'll just have to make my own to enjoy. Now, if you've been following this blog for some time, you'll recall that this isn't the first time I felt drawn towards the stars. Last year I placed a galaxy of cardboard stars on our living room wall. Then earlier this year I painted the inside of an umbrella to look like a galaxy. This time I took a simpler approach and made myself some star artwork using contact paper.
Materials:
- Canvas
- Contact Paper
- Pen
- Scissors
- Paint
- Sponge brushes (or paint brushes)
Directions:
- Sketch out your stars onto the back of your contact paper. Cut the stars out.
- Place the stars on your canvas. Play around with their arrangement until you're satisfied. Once you have a pleasing design, pull the backing off and stick the stars onto your canvas. (Make sure that they are stuck on well so that you get nice crisp lines.)
- Dab paint over your canvas.
- Once the paint dries, carefully peel off your contact paper stars. You should see a bunch of white stars where your contact paper blocked the paint.
Quick and easy, right? Just remember to make sure that your contact paper stars are completely stuck on tight. Eeek! See that leftmost star below? The paint bled through because the contact paper wasn't sticking to the canvas properly.
Happy star crafting!
Saturday, October 5, 2013
Make your own glow in the dark chalk
A couple of weeks ago Chuck and I were perusing the Halloween aisles at Target (for the bajillionth time... what can I say? It's my favorite holiday!) and I spotted a pack of glow in the dark chalk.
Then a light bulb went off in my head. I could buy the chalk... but it'd be more fun to try making my own. So after tinkering around for a bit.... I came up with this result.
What what? Yup. They glow after you "charge" them with light. Just doodle a design at night, shine a light on them to "charge" them, and then turn off your light. Your doodles should glow for a bit and then you'll need to charge them again.
To make this novelty chalk, I simply modified this homemade chalk recipe. Instead of tempera paint, I added 3 T of glow in the dark paint to the mixture. Here's what my chalk looked like setting up:
Have a great weekend!
Then a light bulb went off in my head. I could buy the chalk... but it'd be more fun to try making my own. So after tinkering around for a bit.... I came up with this result.
 |
| Ooh! It glows! |
What what? Yup. They glow after you "charge" them with light. Just doodle a design at night, shine a light on them to "charge" them, and then turn off your light. Your doodles should glow for a bit and then you'll need to charge them again.
To make this novelty chalk, I simply modified this homemade chalk recipe. Instead of tempera paint, I added 3 T of glow in the dark paint to the mixture. Here's what my chalk looked like setting up:
Have a great weekend!
Friday, September 20, 2013
Cardboard Spaceship Climbing Toy
Currently Chuck and I have been reading books about the moon and space travel. He loves the Berenstein Bears "On the Moon" book and Eric Carle's "Papa, please get the moon for me."
So with that in mind, I made him a little cardboard spaceship climbing toy. I found some lovely examples online and one of the mommies in our toddler group made a very simple version out of paper. So, I based my design off of these.
- Cardboard box
- Scissors
- String
- Paint and paint brushes
- Mod Podge and brush (to protect your paint job)
- Packing tape
- Straw
Directions:
This was a really quick and simple toy to make.
1. Cut out your spaceship, moon, and two small rectangular stopper pieces out of cardboard.
2. Paint your spaceship and moon.
3. Once the paint dries, protect your paint job with Mod Podge.
4. Cut your straw in half. Tape it to the back of your spaceship.
5. Fold your long piece of string in half. Tape the middle of the string to the back of your moon. Then, string your two strands through the two straws. Tape the ends of string to your cardboard rectangles so that the spaceship doesn't fall off.
Here's a shot of the mechanics:
And that's it. Simple to make, and simple to use. You don't even have to make a spaceship and a rocket. What about an alien spaceship and earth? Or a basketball player and a basket? The possibilities are endless.
We went this route, and Chuck got a kick out of sending his cardboard rocket to the moon.
Cardboard Rocket Ship sent to the moon from Pink Stripey Socks on Vimeo.
And then, since I was working with cardboard already.... I figured I'd make Chuck some cardboard food as well. All that flying sure gives an astronaut a hearty appetite.
Have a wonderful weekend! See you back on Monday.
Psst- If you've got a ton of cardboard lying around... check out these fun kids' crafts that use cardboard:
Sunday, June 30, 2013
Paint your own galaxy umbrella
Inspired by Carl Sagan's quote, "We are made of star-stuff," I painted this galaxy umbrella:
On the outside the umbrella is black. But open the umbrella up and wow, you're now standing under a galaxy full of twinkling stars. Let's get crafting!
Materials Needed to Paint Umbrella:
(*Note: Some of the links in this post are affiliate links which means I earn a small commission for every purchase at no extra cost to you. Thank you for your support.)- Black Umbrella
- Painter's tape
- Craft Paint
- White fabric paint (I used the bottle because it had a nice tip to draw stars)
- Fabric Medium
- Cups
- Sponge
- Stick for stirring
- Palette (or crapty styrofoam plate)
- Paper towel
- Inspiring photo of the universe
Steps to Make Galaxy Umbrella:
1. Cover the umbrella's ribs with painter's tape.2. Make your fabric paint. Not sure if you have this problem, but I own a ton of craft paint and very little fabric paint. So instead of buying different bottles of fabric paint, I bought one bottle of fabric medium to turn my craft paint into fabric paint. (Wow, right? Oh Martha, you crafty minx! What will you think of next?) Following the bottle's directions, I mixed the fabric medium and the craft paint together to make black, blue, purple, red, yellow, and white fabric paint.
3. Use a dry sponge and a piece of paper towel to dab the different colors on. (I tried starting with my darker colors first and then adding on my lighter colors... but then ended up using darker colors again.... so just play around and have fun with it.)

4. Once you're satisfied with how your background looks, use your white fabric paint to paint stars. (I liked using the bottle because it had a nice neat tip. But, you could also just use the white fabric paint that you previously made and apply it on with a paint brush.)
5. Make some stars cross shaped to look like they're twinkling. Remove painter's tape. Then, let your masterpiece dry overnight.
Voila! Now you've got your very own galaxy. Open this baby up on an icky rainy day and you're guaranteed to feel better.
(Psst- Wanna see another painted umbrella? Check out my "rain, rain, go away" umbrella.)
Have fun creating your own galaxy!
UPDATE 8/26/13- I've now taken this umbrella out a couple of times and the paint is fine. Phew. The only problem that I have with this umbrella is that the insides are now a bit sticky, so the umbrella is a bit more difficult to open.
Sunday, February 17, 2013
Make glow in the dark paint (using glow sticks)
Have you ever had one of those "I wonder if..." moments? A couple of nights ago hubby and I opened a canister of glow sticks to play around with them and take photos.
In the midst of playing, I found myself wondering if I could use their lovely glowing innards to make glow in the dark paint. Now, the label on the glow stick canister clearly said that we shouldn't "puncture" the tubes... but it also said that the glow sticks were nontoxic. So... I figured that as long as we didn't let the paint touch our skin, eyes, or clothes we should be ok. Here's what my glow in the dark painting looked like:
Update 5/29/13- Several concerned readers brought up valuable points regarding possibly dangerous chemicals and glass inside the tubes. Be sure to read the comments below and think twice before attempting this activity...
Materials:
- Scissors
- Disposable container (to hold paint)
- Paint brush
- Paper towel
- Newspaper
- Gloves
- Corn starch
Directions:
1. Cover your area with newspaper and wear gloves (I didn't do this... but looking back I think it would be a good idea since you are working with chemicals.)
2. Crack your glow stick so that the entire stick glows
3. Open up your glow stick. To do this, I held the glow stick vertically over my disposable container. I cut the top bottom end of the glow stick. The liquid inside didn't flow out very quickly. So, I turned the glow stick upside down (so that the cut end was now on top and the uncut end was on the bottom). Then, I cut the bottom uncut end. (We cut it this way so that the tip wouldn't go flying in the air. Plus, the liquid flowed much quicker if both ends were cut.)
3. I added a bit of corn starch to the glowing liquid to thicken up the paint.
4. Use your paint to paint pieces of paper towel placed over newspapers.
Now, I'm sure you already could guess this... but sadly the images don't glow forever. So enjoy their beauty while they last.
Oh yeah- here are some other photos of our glow stick play:

Friday, January 4, 2013
Crapty DIY galaxy light jar
You know how there are TONS and TONS of beautiful craft posts floating around online?
Well, this isn't one of them.
This week's crapt is a DIY galaxy light jar... and it came out looking a tad... crapty.
Don't get me wrong, making this galaxy light jar would be a really fun activity to do with a young child. And if you squint your eyes and tilt your head just so... the jar and lights do sort of resemble the night sky. But, sadly mine just didn't turn out as cool looking as the one from this Design Mom post. Perhaps I needed a stronger LED light? Or a jar with a wider mouth? Hmm....
Anyway, if you love the night sky, or if you have a child that loves staring at the stars and space, maybe you'd like to make one of these? Here's what you'll need:
Materials:
- scissors
- tape
- skewer
- 1 small LED light (I just used our bicycle light)
- jar (with opening large enough to fit your light)
- disposable cake tin <-- crap!
Directions:
(1) Smooth out your cake tin (I just rubbed the scissor's handles against the metal to flatten out the ridges)
(2) Cut out a rectangle from your cake tin. Make sure that it's tall as your jar (it reaches from the bottom all the way to the lid)
(3) Trace the bottom of your jar onto the cake tin and cut the circle out.
(4) Use a skewer to punch a bunch of holes into your rectangle and circle. (You want to see lots of starry light, so you'll need to punch a loooot of holes.)
(5) Tape your metal circle to the bottom of the jar
(6) Roll your rectangle into a cylinder. Tape the cylinder so it keeps its shape. Squeeze your cylinder into your jar.
(7) Turn on your LED light and drop it in the jar. (Make sure the light faces the bottom of the jar.) Screw on the lid.
(8) Turn off the lights in your room. Orient the jar so that it's resting on the lid. Enjoy your very own mini galaxy.
Well, this isn't one of them.
This week's crapt is a DIY galaxy light jar... and it came out looking a tad... crapty.
Don't get me wrong, making this galaxy light jar would be a really fun activity to do with a young child. And if you squint your eyes and tilt your head just so... the jar and lights do sort of resemble the night sky. But, sadly mine just didn't turn out as cool looking as the one from this Design Mom post. Perhaps I needed a stronger LED light? Or a jar with a wider mouth? Hmm....
Anyway, if you love the night sky, or if you have a child that loves staring at the stars and space, maybe you'd like to make one of these? Here's what you'll need:
Materials:
- scissors
- tape
- skewer
- 1 small LED light (I just used our bicycle light)
- jar (with opening large enough to fit your light)
- disposable cake tin <-- crap!
Directions:
(1) Smooth out your cake tin (I just rubbed the scissor's handles against the metal to flatten out the ridges)
(2) Cut out a rectangle from your cake tin. Make sure that it's tall as your jar (it reaches from the bottom all the way to the lid)
(3) Trace the bottom of your jar onto the cake tin and cut the circle out.
(4) Use a skewer to punch a bunch of holes into your rectangle and circle. (You want to see lots of starry light, so you'll need to punch a loooot of holes.)
(5) Tape your metal circle to the bottom of the jar
(6) Roll your rectangle into a cylinder. Tape the cylinder so it keeps its shape. Squeeze your cylinder into your jar.
 |
| Yup. It's looking crapty already.... |
(8) Turn off the lights in your room. Orient the jar so that it's resting on the lid. Enjoy your very own mini galaxy.
Subscribe to:
Posts (Atom)

