Showing posts sorted by date for query rock. Sort by relevance Show all posts
Showing posts sorted by date for query rock. Sort by relevance Show all posts
Wednesday, March 4, 2015
Rock Tic-Tac-Toe Game
Ah, oil pastels. After seeing that they could be used to decorate pumpkins, I thought they would be perfect for creating a cute and colorful rock tic-tac-toe game.
Tuesday, February 24, 2015
Make Sand Dough Sculptures and Ornaments
Whenever we go to the beach and build with sand, I always feel slightly sad knowing that our creations will eventually wash away. Do you ever feel that way too? I recently found this great book at the library Kids' Crazy Concoctions (affiliate link) that shared a recipe for making homemade gluten free sand dough! Yup. You just need 3 ingredients to whip up a batch of this stuff. Then, once you're done making your creations, wait over night and they'll dry nice and hard. Isn't it cool? You can make your very own long-lasting sand dough sculptures and ornaments!
Make Sand Dough Sculptures and Ornaments!
This post contains affiliate links. Thank you for your support!
Friday, February 6, 2015
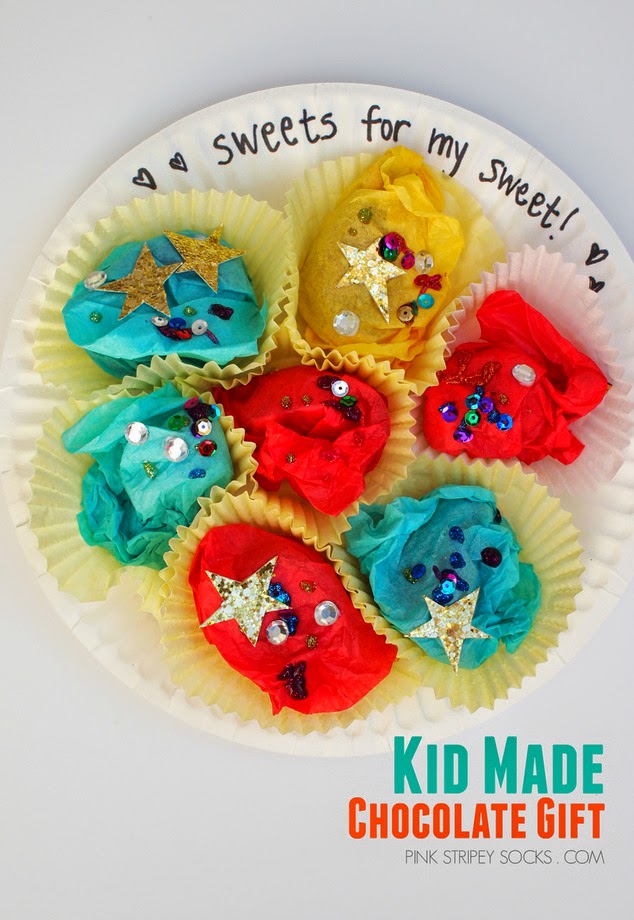
Easy Kid made Valentine Chocolate Gift
Handmade gifts rock. This week's Creative Preschool Collaborator theme is Valentine's Day! Since hubby REALLY loves chocolate, Chuck and I made him a special chocolate Valentine's gift. Shhh. Don't tell him about it. It's a surprise!
Aren't they cute? They look so fun and colorful... almost like cupcakes! We had a ton of fun making this plate of goodies. Chuck even enjoyed it more than our Kiss Wrapping Paper! So keep reading to see how we made this lovely gift and check out 4 other great Valentine's activities and crafts from the other members of the Creative Preschool Team.
Kid Made Valentine Chocolate Gift
This post contains affiliate links. Thank you for your support!
Monday, January 26, 2015
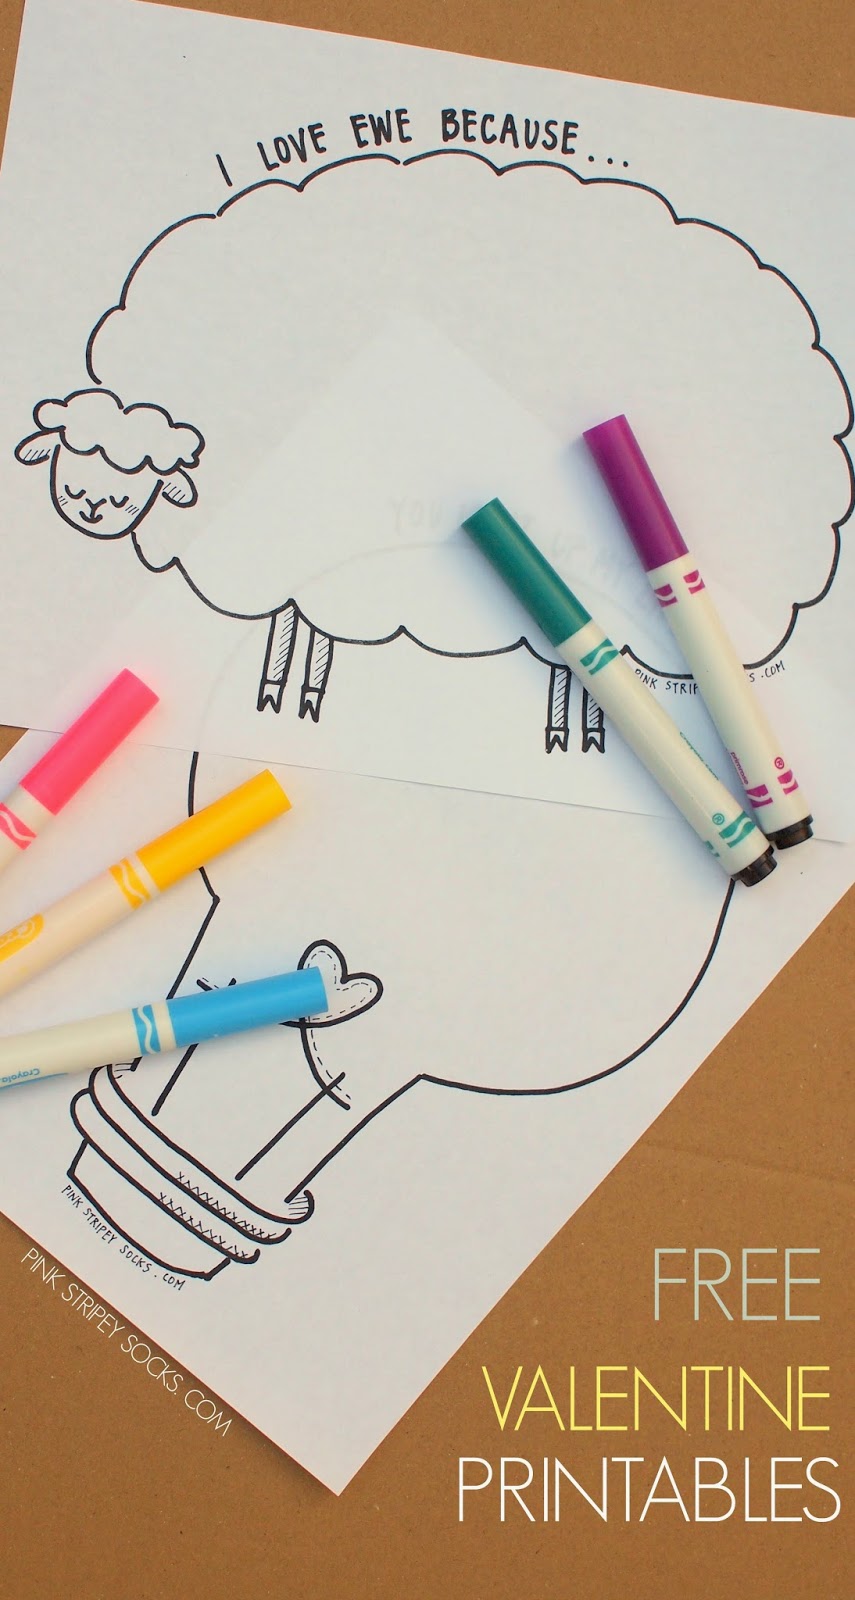
FREE Valentine Printables
Today I'm continuing the funny Valentine Day Series with these 2 free Valentine Printables! To see the other funny Valentine's day crafts in this series, check out the links below!
- #1- You "Rock my World" Rocks
- #2 - "Set my heart aflutter" butterfly notebooks
- #3- Send "High Fives" To your Valentine!
Funny Valentine's Day activity #4: 2 FREE Valentine Printables!
Friday, January 16, 2015
Send High Fives to your Valentine!
Are you looking for a unique and simple idea for a Valentine's day card? Or, are you looking for a quick way to send someone some encouragement? How about sending them some high fives?
This is the 3rd installment in my funny Valentine's Day craft series. (To see the other ideas, check out my "Valentine, you rock!" Rocks and "You set my heart aflutter" Butterfly Notebooks.)
Lately Chuck hasn't really wanted to do any crafting. But I loooove making things, so I've been trying hard to figure out other ways we can craft together. I've noticed that while he may not like painting or drawing, he does seem to like using technology. Light bulb moment! So instead of usign paint or plaster of paris to make traditional hand print crafts, we used technology!
Funny Valentine's Day Craft 3: Send someone high fives!
This is the 3rd installment in my funny Valentine's Day craft series. (To see the other ideas, check out my "Valentine, you rock!" Rocks and "You set my heart aflutter" Butterfly Notebooks.)
Lately Chuck hasn't really wanted to do any crafting. But I loooove making things, so I've been trying hard to figure out other ways we can craft together. I've noticed that while he may not like painting or drawing, he does seem to like using technology. Light bulb moment! So instead of usign paint or plaster of paris to make traditional hand print crafts, we used technology!
Wednesday, January 7, 2015
Valentine, you set my heart aflutter
Last week I shared about our new fascination with butterflies. (You can read about it and see our fluttering butterfly kid craft here.) My mind was still on butterflies when I came up with this idea for a DIY butterfly notebook.
You can easily make this butterfly notebook from items lying around your home. Plus, it would be a nice handmade gift to give someone for Valentine's Day too. (It even fits into our 10 funny pun-y Valentine's Day craft series!)
You can see my first funny, pun-y craft here (Craft 1: "You Rock My World" Rocks).
You can easily make this butterfly notebook from items lying around your home. Plus, it would be a nice handmade gift to give someone for Valentine's Day too. (It even fits into our 10 funny pun-y Valentine's Day craft series!)
Funny Pun-y Valentine's Day Craft 2: "You set my Heart aflutter" Butterfly Notebooks!
You can see my first funny, pun-y craft here (Craft 1: "You Rock My World" Rocks).
Monday, January 5, 2015
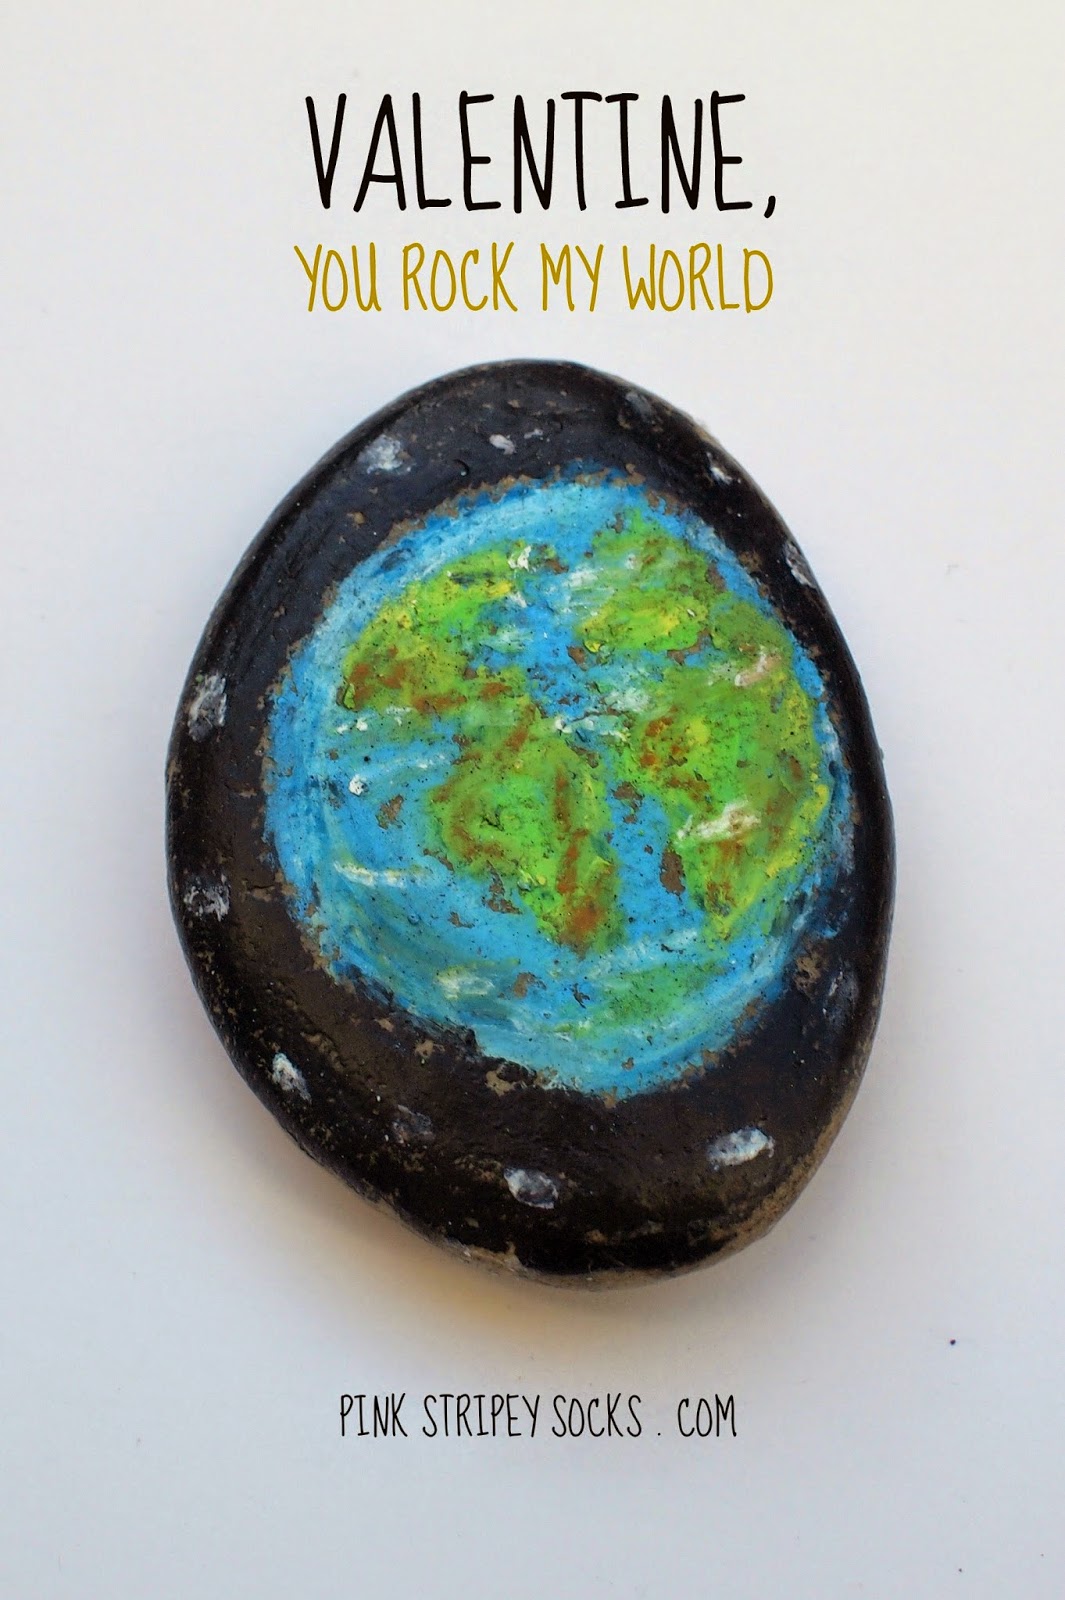
Valentine, You ROCK MY WORLD!
Even though our Christmas tree is still up (I know, I know, I haven't the heart to take it down), my mind is currently on Valentine's Day and all the lovely crafts that go along with that. Last year we made adorable heart shaped glasses and DIY Coffee and Candy Gifts. This year I'm challenging myself to think of 10 easy funny, pun-y crafts that say Happy Valentine's Day!
Here's my 1st attempt!
Here's my 1st attempt!
Funny Pun-y Valentine's Day 1:
"Valentine, You Rock My World" Rocks
This post contains affiliate links. Thank you for your support.
Monday, November 3, 2014
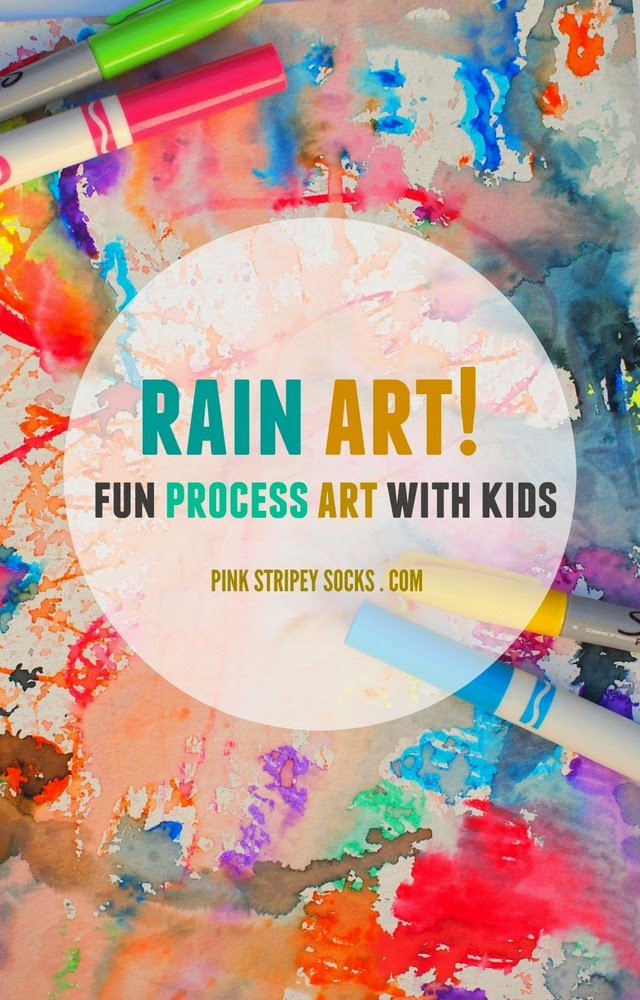
Rainy Day Process Art
We got rain! We got rain! Whoopie! This was a pretty big deal here in SoCal because we've been in the middle of a drought for a looooong time. Since I love trying easy art projects with Chuck, we took advantage of the rain and collaborated with Mother Nature to create some beautiful rainy day process art.
This was a really fun and easy art project. I really enjoyed it because we didn't concern ourselves so much with the final product. Instead, we just really enjoyed making art together and then watching Mother Nature add her bit too.
Here's how we made our rainy day process art!
Let's Make Rainy Day Process Art!
This post contains affiliate links. Thank you for your support!
This was a really fun and easy art project. I really enjoyed it because we didn't concern ourselves so much with the final product. Instead, we just really enjoyed making art together and then watching Mother Nature add her bit too.
Here's how we made our rainy day process art!
Thursday, October 23, 2014
Halloween Art: No Carve Colorful Pumpkins
Looking for an easy way to colorfully decorate your Halloween pumpkins this year? Then this no-carve method is right up your alley! Here's one great way to make some fabulous, colorful Halloween art with the kids!
Halloween Art: No Carve Colorful Pumpkins!
This post contains affiliate links. Thank you for your support!
Tuesday, September 9, 2014
Make Prehistoric Rock Art with Kids
Some of my fondest memories of History classes were times when teachers assigned projects instead of tests. In 5th grade my friends and I did a presentation on the first transcontinental railroad. I still remember wearing costumes and using tea to age our documents. In 9th grade we shot a soap opera style video featuring King Henry the Eighth's wives. It was fun to write and film... and even more hilarious to watch. (Picture bad high school acting mixed with Monty Python style humor. Yup. Good times.) Honestly, I don't remember much else from History classes (ack, sorry previous teachers!) but these projects shine brightly in my memory. They were fun to make and really made history come alive. Hopefully today's craft will help do that for your kids too! If they're interested in prehistoric times or art history, then this Prehistoric Rock Art Craft is for them!
The techniques used to make this rock art is pretty much the same that I used to make this super cute mini Plaster of Paris Christmas village. So if you liked doing this craft, check that one out too.
Ok. Now let's make some rock art!
Make Prehistoric Rock Art with Kids
(This post contains affiliate links. Thank you for your support!)
The techniques used to make this rock art is pretty much the same that I used to make this super cute mini Plaster of Paris Christmas village. So if you liked doing this craft, check that one out too.
Ok. Now let's make some rock art!
Thursday, August 21, 2014
Building Play Dough and Rock Houses
Happy Friday everybody! Today I just wanted to share with you a really, really easy and fun activity that Chuck and I recently did together. Inspired by fellow Rockin' Art Mom Babble Dabble Do's Clay and Wood Block Structures, Chuck and I built Rock and Play Dough Houses!
We've been going to the beach once a week lately, and I always come home with lovely rocks. To justify my slowly growing pile of rocks, I thought this would be a great way for us to use them in a fun and creative way.
Building with Rock and Playdough!
(This post contains affiliate links. Thank you for your support!)
We've been going to the beach once a week lately, and I always come home with lovely rocks. To justify my slowly growing pile of rocks, I thought this would be a great way for us to use them in a fun and creative way.
Tuesday, May 6, 2014
Painted Twig Wall Hanging
Painted Twig Wall Art
Chuck's still too young to completely understand the idea of Mother's
Day. But if he were going to give me a handmade gift this Sunday, I'd
venture to say that this Painted Twig Wall Hanging would probably
be it. My little guy has an eye for twigs. Whenever we go for a walk outside, we inevitably bring
back a twig, or a rock, or a leaf (luckily, he hasn't asked to bring back any bugs yet. I might have to put my foot down there.) Our nature collection tends to grow pretty quickly. That's why I really like this twig wall art. It's a beautiful way to remember walks outside, showcase his collection, and do some fun mommy-son crafting too.
Tuesday, April 22, 2014
How to do Flower Pounding
Happy Earth Day everyone! How's the weather where you are? It's slowly getting warmer and sunnier over here, so Chuck and I have been taking nature walks around our neighborhood. I was surprised to see so many tiny flowers blooming. (Nature is so resilient, isn't she?) Chuck really loved seeing the colorful blossoms too. We ended up picking quite a few and bringing them back to do some flower pounding.
This craft basically involves hitting flowers (or grass or leaves) with a hammer or rock to release their pigment. As you can probably guess, it was a big hit with the little guy. (Sorry downstairs neighbors!) Keep reading to see how we pounded our flowers!
How to do Flower Pounding With Kids
This craft basically involves hitting flowers (or grass or leaves) with a hammer or rock to release their pigment. As you can probably guess, it was a big hit with the little guy. (Sorry downstairs neighbors!) Keep reading to see how we pounded our flowers!
Friday, January 31, 2014
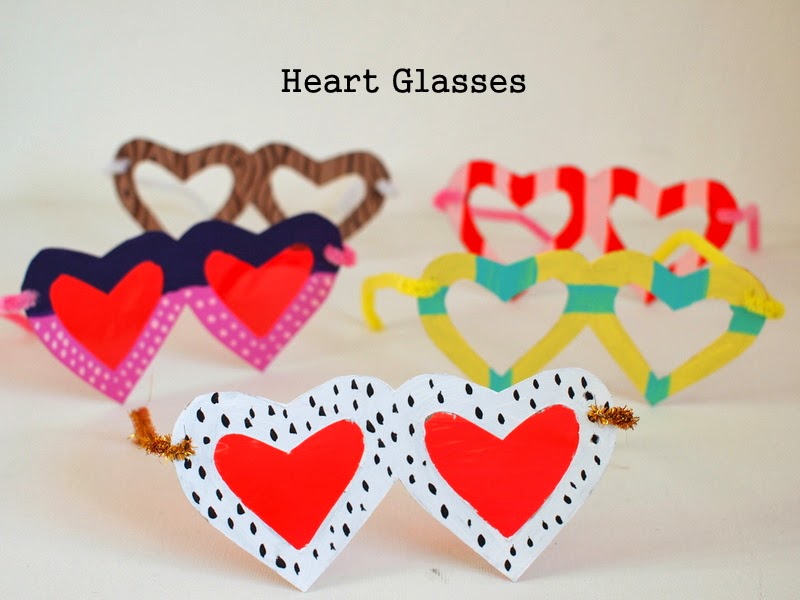
Two Heart themed Valentine's Crafts- Heart Glasses and Painted Heart Rocks
Note: This post is sponsored by Plaid, but the opinions are 100% mine.
Did you know that the heart is my favorite shape? (Is it weird that I have a favorite shape?) I know that triangles and hexagons are super trendy right now, but I'm an old-fashioned romantic. Hearts will always have a special place in my... well heart. (Tee hee hee.) So when Plaid sent me a box of Apple Barrel Craft Paint to create a Valentine's Day School Craft, I knew that it had to be heart related.
So I came up with these Cereal box Heart Glasses and Heart Painted Rocks. Both crafts are super colorful and fun to make.
Keep reading to see directions and template!
Did you know that the heart is my favorite shape? (Is it weird that I have a favorite shape?) I know that triangles and hexagons are super trendy right now, but I'm an old-fashioned romantic. Hearts will always have a special place in my... well heart. (Tee hee hee.) So when Plaid sent me a box of Apple Barrel Craft Paint to create a Valentine's Day School Craft, I knew that it had to be heart related.
So I came up with these Cereal box Heart Glasses and Heart Painted Rocks. Both crafts are super colorful and fun to make.
Cereal box Heart Glasses
Keep reading to see directions and template!
Tuesday, September 10, 2013
Make Homemade Sidewalk Chalk
I'd been meaning to try my hand at making homemade sidewalk chalk out of plaster of paris for awhile now. But I never got up the nerve to try it out until this past weekend. As I stared at my craft cabinet filled with dozens of empty toilet paper rolls, I felt the crafting itch take over.
Armed with my Michaels coupons, I took the plunge and bought myself some plaster of paris. Then, a day later, Chuck and I made these:
Like the two colors? Me too. Now we get both pink and blue all in one piece of chalk. Whoa. Mind blowing.
Armed with my Michaels coupons, I took the plunge and bought myself some plaster of paris. Then, a day later, Chuck and I made these:
Like the two colors? Me too. Now we get both pink and blue all in one piece of chalk. Whoa. Mind blowing.
Thursday, July 11, 2013
Two-ingredient homemade ice-cream
What can I say? The title pretty much says it all.
A couple of days ago, I found Kevin and Amanda's recipe for homemade ice-cream. It immediately caught my eye because it didn't require an ice-cream machine or rock salt. Plus, you only needed two ingredients to make the basic vanilla recipe.
Say what? You must be kidding.
Nope. They were serious.... ice-cream serious.
So of course I had to try it out for myself. The results? Take a look below:
It was yummy and had a light texture and super creamy taste.
Chuck ab-so-lutely loved it.
We tried their cinnamon bun ice-cream recipe. I've put the recipe below, but you can find other yummy flavors on their blog like Nutella peanut butter chip, Krispy cream, and hazelnut mocha fudge swirl. Yum, yum, and double yum.
Cinnamon Bun Ice-cream Recipe (from Kevin and Amanda):
Ingredients:
2 C heavy cream
1 14 oz can of sweetened condensed milk
3 T of melted butter
1/2 tsp ground cinnamon
1/2 tsp vanilla extract
Directions:
1. Whip heavy cream into stiff peaks.
2. Thoroughly whisk the butter, cinnamon, vanilla, and condensed milk together in a very large bowl.
3. Fold the whip cream into your butter/cinnamon/vanilla/condensed milk mixture.
4. Pour everything into a 2-qt tupperware container. Cover and freeze until firm. (I waited overnight.)
Then, enjoy (and feel like a cool foodie because you just made ice-cream from scratch).
Have a great weekend. See you next week!
Wednesday, May 8, 2013
Homemade watercolor paints
Yesterday it rained a whooole lot.
Luckily, my homemade watercolor paints finally set (after two days of waiting), so Chuck and I spent the morning painting.
Overall, the directions I used were pretty good, but I made two changes:
1. I only used half of the materials recommended... and I still had plenty of water color paints.
2. I added drops of food coloring to each of the ice cube trays. (Looking back, maybe I should have compensated for the extra liquid by adding a bit more cornstarch to shorten my drying time.)

As you can see, Chuck enjoyed painting. He also enjoyed repeatedly dipping the Q-tips into the water... and sneakily trying to drink the dirty water. (Ick.) I probably had more fun painting than he did because I was so delighted that the paints actually worked.
Here are our two joint paintings:
The paints weren't chalky when they dried. We'll probably cut up the cards to make a birthday card for a niece. Right now the leftover paints are sitting in the fridge. We'll keep using them throughout the week because I'm curious how long they'll last.
UPDATE: 5/24- I pulled the paints out of the fridge yesterday and they were rock hard. I was worried, but after I didn't need to be. After adding a couple drops of water into each well, they became paints again. The colors didn't seem as vibrant as before, so Chuck and I ditched the q-tips and just used our fingers to paint. We got some lovely results. Now they're back in the fridge again, and I'll pull them out in another couple of weeks to see if they last.
Have you ever tried to make homemade watercolors before?
Luckily, my homemade watercolor paints finally set (after two days of waiting), so Chuck and I spent the morning painting.
1. I only used half of the materials recommended... and I still had plenty of water color paints.
2. I added drops of food coloring to each of the ice cube trays. (Looking back, maybe I should have compensated for the extra liquid by adding a bit more cornstarch to shorten my drying time.)

As you can see, Chuck enjoyed painting. He also enjoyed repeatedly dipping the Q-tips into the water... and sneakily trying to drink the dirty water. (Ick.) I probably had more fun painting than he did because I was so delighted that the paints actually worked.
Here are our two joint paintings:
The paints weren't chalky when they dried. We'll probably cut up the cards to make a birthday card for a niece. Right now the leftover paints are sitting in the fridge. We'll keep using them throughout the week because I'm curious how long they'll last.
UPDATE: 5/24- I pulled the paints out of the fridge yesterday and they were rock hard. I was worried, but after I didn't need to be. After adding a couple drops of water into each well, they became paints again. The colors didn't seem as vibrant as before, so Chuck and I ditched the q-tips and just used our fingers to paint. We got some lovely results. Now they're back in the fridge again, and I'll pull them out in another couple of weeks to see if they last.
Have you ever tried to make homemade watercolors before?
Thursday, April 18, 2013
I can't believe I...
recently created an official Pink Stripey Socks Facebook page for my blog.
This was a pretty big deal for me. You're probably thinking "Who cares? It's no big deal. Everybody uses social media nowadays."
Urm... well... confession time- you're talking to the girl who's been hiding under a technology rock for the past couple of years. I don'ttwit tweet. I just got a personal Facebook page last October. (I know, I know.) And since we're airing dirty little secrets, I might as well let you know that I don't own a smart phone or a texting plan.
I know. *Gasp* I'm a technological dinosaur. Rawr!
But ever since I chose the word "try" as my word of the year, I figured I should try this newfangled social media thing out. I really love blogging and crafting, so this seems like a nice way to connect with others and grow as a blogger. I'm not going to lie. I'm still nervous about creating the Facebook page because it means that I'm putting myself out there and I'm taking this whole blogging thing more seriously. Will everything just end up blowing up in my face? I don't know. Not sure. Hopefully not. But I just have to try and see where this adventure leads.
Does this mean that you'll soon see metwittering twitting tweeting? Urm, probably not. (Those hash tags really scare me.) Or, does it mean that I'll start texting and get a data plan? lol! omg no way :) Baby steps, my friend, baby steps.
And since we're nearing the end of this post, I just wanted to upload this cactus doodle because seeing faces on cacti just makes me smile.
(Psst- Special thanks to Kira at Her New Leaf blog for providing lovely free social media buttons and clear, easy-to-follow instructions. They were perfect for a techno-phobe like me.)
This was a pretty big deal for me. You're probably thinking "Who cares? It's no big deal. Everybody uses social media nowadays."
Urm... well... confession time- you're talking to the girl who's been hiding under a technology rock for the past couple of years. I don't
I know. *Gasp* I'm a technological dinosaur. Rawr!
But ever since I chose the word "try" as my word of the year, I figured I should try this newfangled social media thing out. I really love blogging and crafting, so this seems like a nice way to connect with others and grow as a blogger. I'm not going to lie. I'm still nervous about creating the Facebook page because it means that I'm putting myself out there and I'm taking this whole blogging thing more seriously. Will everything just end up blowing up in my face? I don't know. Not sure. Hopefully not. But I just have to try and see where this adventure leads.
Does this mean that you'll soon see me
And since we're nearing the end of this post, I just wanted to upload this cactus doodle because seeing faces on cacti just makes me smile.
(Psst- Special thanks to Kira at Her New Leaf blog for providing lovely free social media buttons and clear, easy-to-follow instructions. They were perfect for a techno-phobe like me.)
Thursday, April 4, 2013
DIY Studded leather gloves
Guess what I made while Chuck took a nap yesterday?
A pair of studded black leather gloves for a tough chica friend
Although Spring is right at our doorstep, I had been meaning to make these leather gloves for quite awhile. Last winter, one of my college friends came into town and we did a little window shopping. She found a pair of black leather gloves at Urban Outfitters and debated whether or not to get them. In the end, she left them behind.
I kept thinking about her studded gloves for the next couple of months. When the weather got warmer, tons of stores had winter sales to clear out their merchandise. Once I saw this pair of black leather gloves on sale, I snatched them right up.
Here are the materials that I used:
- Black leather gloves
- Sharp pair of fabric scissors
- Chalk
- Golden cone spikes
 |
| The spikes contained two parts: The sharp spiky cone and the screw |
1. Use chalk to mark where the spikes will go.
2. Use the pointy part of your fabric scissors to pierce the top of your gloves. (Make sure not to pierce through the bottom as well!) Poke your screwback through the leather and screw the cone on.
And that's basically all you need to do to make a pair of tough girl gloves. The spikes are surprisingly easy to screw on and the screwbacks didn't bother my hand one bit.
 |
| What do you think? Rock star fashion statement? Or, tough chic weapon? |
Wednesday, February 13, 2013
Make Eggshell dolls
During a recent trip to our library, I found a couple of old craft books showing how to create dolls from eggshells. I'd never seen this type of craft before, so I was super excited to try it out.
If you're like me, you have a thing for Matryoshka dolls... and fairy tales. (Random tangent time: As a kid I used to read tons and tons of fairy tales. Magical powers? Fairies? Elves? Yup. Yup. Yup. I loved it all. This love for fairy tales ended up morphing into a love of science fiction and fantasy novels later on... but I digress.)
If you're like me, you have a thing for Matryoshka dolls... and fairy tales. (Random tangent time: As a kid I used to read tons and tons of fairy tales. Magical powers? Fairies? Elves? Yup. Yup. Yup. I loved it all. This love for fairy tales ended up morphing into a love of science fiction and fantasy novels later on... but I digress.)
Here are my results:
Make Eggshell Dolls
I had fun making them... but I had way more fun decorating them. In my opinion, painting cute things is the best part about crafting.
If you'd like to make your own eggshell dolls, read on!
Subscribe to:
Posts (Atom)


