Friday, November 22, 2013

Super easy DIY Toddler Dominos

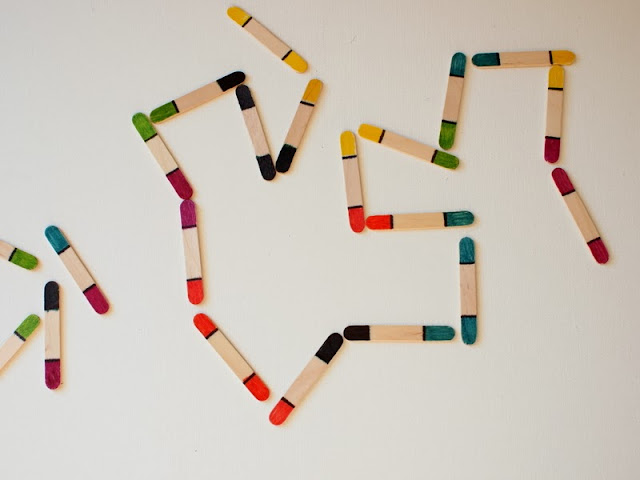
Do you love dominos?  With the daylight hours getting shorter, sometimes Chuck and I find ourselves twiddling our thumbs, wondering what to do to pass the time.  Lately I've been making him new playthings out of random stuff that's lying around the apartment.  Here's one super easy toy that was made using mini craft sticks and Sharpie markers.  

Super Easy DIY Toddler Dominos


super easy popsicle stick toddler dominos


Materials Needed to make DIY Dominos Game:

  • Mini Craft Sticks (I used 21)
  • Distinctly Different Colored Sharpie Markers (I used 6 colors)
  • Plastic Sandwich bag
  • Scrap paper

Directions to Make DIY Dominos Game


DIY Sharpie and Popsicle Stick Dominos
1.  Cover your work area with a piece of scrap paper so the Sharpie markers won't stain it.

2.  Color the ends of your craft sticks different colors.  (I used 6 different markers to color 21 craft sticks.  I tried to make sure that each color was used the same number of times.  So, each marker colored one end of 5 mini craft sticks and both ends of 1 craft stick.  Does that make sense?  Erm... there must be a mathematical equation to explain that....)

3.  Place your sticks in a plastic bag until you're ready to play!

Yurp.  Suuuuuper easie peasie.

Make your own set of popsicle stick dominos

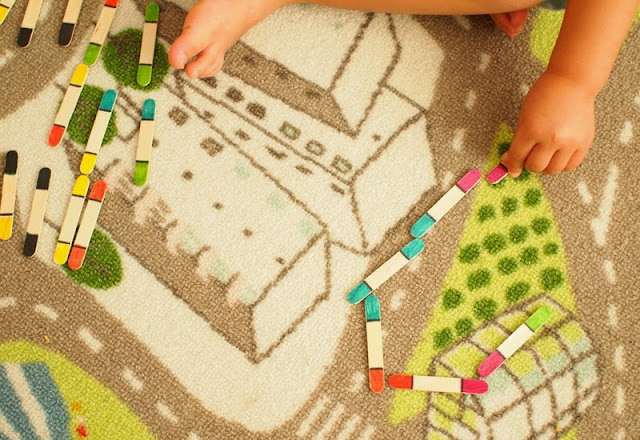
To make it easier for my 2 year old, I first placed the sticks in rows, colored sides up.  I wanted him to be able to see all of his choices as we played.  Once I explained the game, I had to do quite a bit of prompting to get him to find matching colors.

At first he didn't seem to understand that we had to place our sticks a certain way.  But once I told him that the two matching colors had to "kiss" each other, he got it.  (Not sure why, but he got a big kick out of making his two sticks "kiss.")

Overall, our game lasted a couple of minutes... and then he ended up using the sticks to make a house for... you guessed it, one of his beloved cars.     

Happy toddler toy crafting!
how to play with DIY toddler popsicle stick dominos kids craft


Thursday, November 21, 2013

DIY Crapted Wrapping paper (Plastic Bag Printing and Cat Stencils) and DIY Washi Tape

Alright, this post's title is rather crazy.  In my defense, I just put everything up there because I couldn't figure out a better way to incorporate all the ideas into one slick title.

Hrmm... let's take a step back and start again.

*Breathes*

My sister's birthday is coming up next week.  I already bought her a gift and thought it would be nice to crapt the wrapping paper.  So, I cut up a paper bag (the kind that you get from a store when you buy stuff) and made these two crapty wrapping paper patterns:

The design on the left was made using this Plastic Bag printing method.  It was inspired by my sister's love of turtles.  (That's what the green blobs are.)

The design on the right is made using cereal box stencils.  It's a bit more modern.  (Psst- Can you tell that it's a bunch of golden cat faces?)

Would you like to see how I printed the patterns?  If so, read on!  If not, you can always eat some ice-cream. Yum.

How to make cat stenciled wrapping paper:
Materials:
  • Cereal box
  • Pen
  • Pencil
  • Exacto Knife
  • Scissors
  • Cutting mat
  • Paint
  • Sponge brush
  • Paper towel

Directions:

1.  Doodle your cat face on a piece of cereal box.  Cut the face out.

2.  To keep your design even, first use a pencil to lightly mark where you want your cat faces.  (I used my stencil as a guide.)  Then, stencil your design over your pencil marks.  When you're stenciling, don't load too much paint onto your sponge brush and keep your hand steady as you hold down the stencil so you don't smudge your design.  If you're worried, you can always do a couple of trial runs on a piece of scrap paper first.

3.  Let your design dry and you're done!  Meow!


How to make a plastic bag printed wrapping paper design:
Materials:
  • Sandwich bag
  • Paint
  • Paint brush
  • Q-tip
  • Paper Towel

Directions:

1.  "Ink" your plastic bag by painting over a portion of it.  (If you're a clutz like me, only paint in the middle of your bag.  This way your hands won't smear the paint when you flip the bag over.)
2.  Use a Q-tip (or the back of your paint brush) to remove bits of paint and create a design.
3.  Flip your bag around and press the painted side on top of your wrapping paper.  Rub your hand over the design to make sure it transfered.
4. Repeat this step to add other blocks of colors or designs.  (I used the same bag throughout and simply wiped off excess paint with a paper towel.)

You can also paint little shapes onto your bag and then use those to make prints too.


As you can see, I added some turtles and yellow flowers to complete the print.

And since I was already making the wrapping paper, I figured I might as well make fake washi tape out of masking tape.  I simply took pieces of masking tape, stuck them to parchment paper, and then doodled on them with Sharpie markers.  The ends of the tape don't completely adhere to the parchment paper, but that's ok because I used the tape up right away.


Did you make it this far?  Phew.  *High five.*  This was a long post.  Here's a photo of the final product.  (I chose the cat design because it looked cooler.  Plus, my sister really loves her cat.)


Here's a photo of the back.  Yurp.  I went crazy with my fake washi tape because the patterns were just too cute.

Happy Thursday!

Wednesday, November 20, 2013

Geometric Popsicle Stick Christmas Tree Ornament Craft

Christmas tree ornaments?  What? 

Yurp.  I know that we haven't celebrated Thanksgiving yet.... and this craft is for Christmas... but please bear with me.  I was bored one night and began playing around with leftover mini craft popsicle sticks.  After messing around with them for a bit, I came up with this easy, geometric looking Christmas tree ornament.


It was really easy to make, so if you like the design, the kiddos can certainly help out too. (Ooh.   Did you notice the sequins?  Bling bling!)


Here's what I did:

Materials:
  • Mini Popsicle Sticks (I used 22)
  • Scrap paper
  • Paint Brush
  • Paint (Shades of green and brown)
  • Hot glue gun
  • Parchment paper
  • Sequins 
  • String or ribbon

 Directions:
1.    Cover your work area.  Paint 18 of your popsicle sticks shades of green.  Paint 4 of your popsicle sticks shades of brown.  (I only painted the front and the sides of the sticks, but you might want to paint the backs too if your ornament is going to twirl around.)

2.  Once your paint dries, begin hot gluing your sticks together.  (I made sure to hot glue on top of parchment paper so my glue won't stick to my work surface.  Cheapie crapter tip:  You can reuse this parchment paper for other project too!)  To ensure that my triangles looked the same, I made one triangle first, then traced the corners onto the parchment paper. I then used those corners as guidelines when hot gluing other triangles.)

3.  Hot glue your "trunk" sticks on.

4.  Hot glue your sequins onto the green triangles' corners.

Smaller versions would like nice as ornaments or strung together as a garland.  Right now my bigger tree is just hanging outside of our door, waiting for December.

Happy Wednesday!